Distortion effect and offsets explained
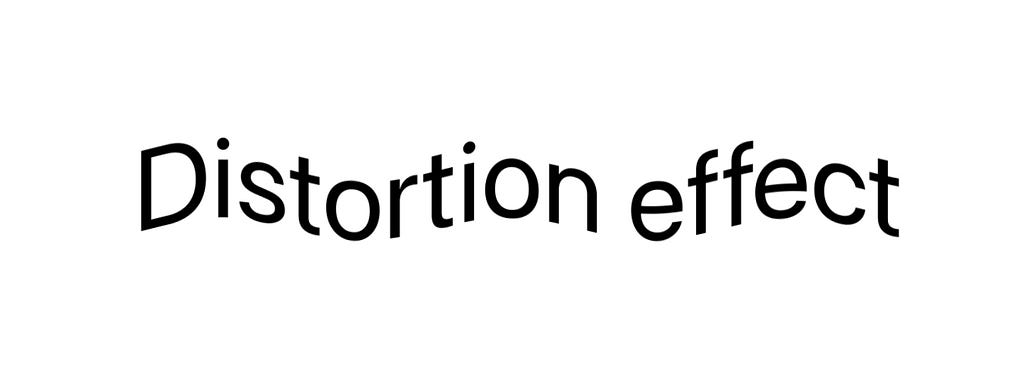
With iOS 17, Apple introduced new view modifiers to connect SwiftUI views and Metal Shaders. We can now manipulate colors, shapes, and much more, with the process running on the GPU with Metal.
Metal and SwiftUI
There are three different effects that you can now apply to SwiftUI views to modify pixel color or position with optimal performance.
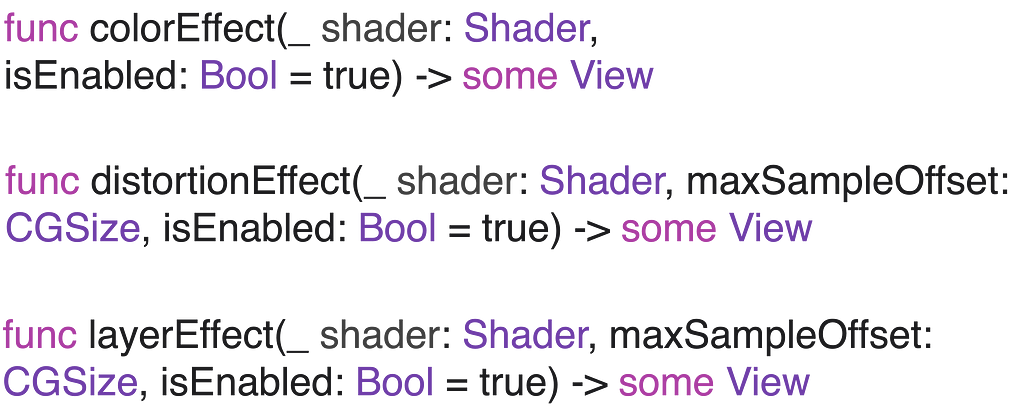
Note: available for iOS 17+ / macOS 14+ only.
Applying metal shaders to SwiftUI views
To work with those effects, you should create Metal shading functions and then wrap them in newly introduced Shader structures. Then those shaders can be applied to any SwiftUI views with the corresponding view modifiers.
Distortion effect explained
In this article, we will focus on the distortion effect and its maxSampleOffset parameter in particular.
Distortion effect modifier returns a new view that applies some shader to self as a geometric distortion effect on the location of each pixel.
It is very important to understand how exactly the distortion shader is processing pixels. For a shader function to act as a distortion effect, it must have a function signature matching the following:
[[ stitchable ]] float2 name(float2 position, args…)
Where position is the user-space coordinates of the destination pixel applied to the shader. The function should return the user-space coordinates of the corresponding source pixel.
This means we process the resulting image pixel by pixel, not the source one, which is key to understanding the shading process.
It also can be interpreted in a way that returning the x+n for the x coordinate will not “move” the view to the right but to the left.
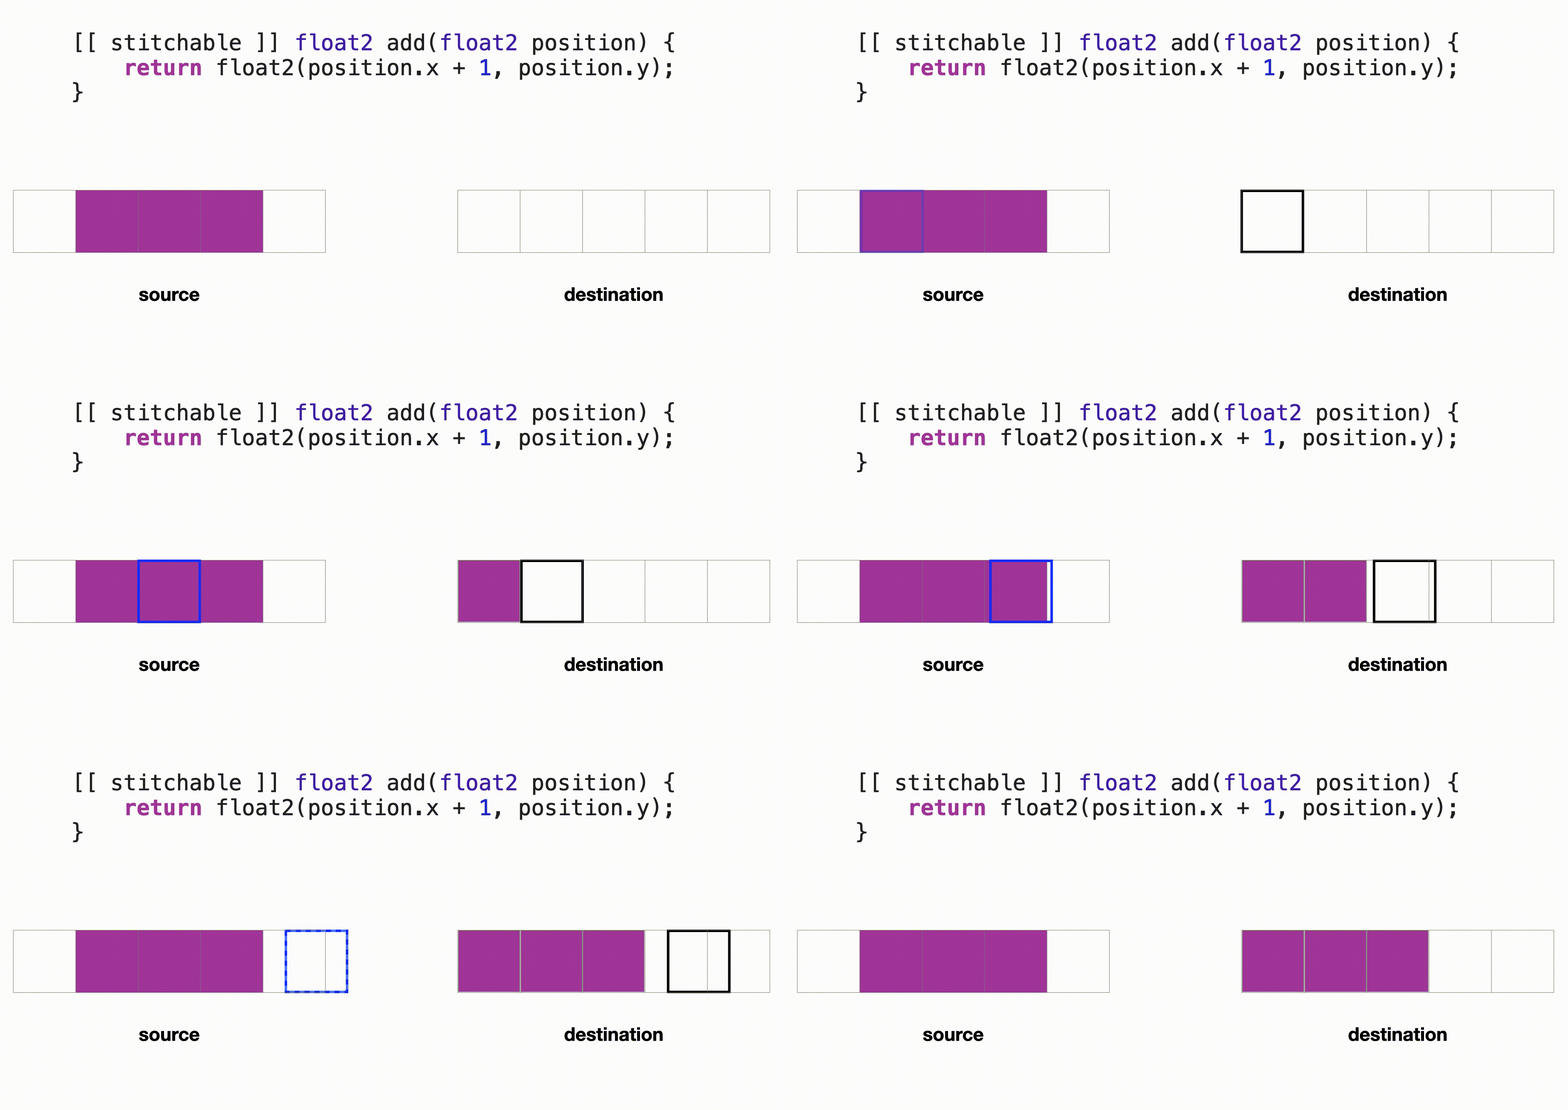
The distortion effect has two main parameters:
Shader — the function to apply as a distortion effect.
maxSampleOffset — the maximum distance in each axis between the returned source pixel position and the destination pixel position, for all source pixels.
The intention of the maxSampleOffset parameter may look all clear, but it has some tricky (and not at all documented) details.
Distortion examples
For our test purposes, we’re going to use a simple shader called add. It will only modify the x pixel coordinate by a fixed value of 25px.
[[ stitchable ]] float2 add(float2 position) {
    return float2(position.x + 25, position.y);
}
We’ll create different views and test the various shader/view combinations to make some conclusions about how is it supposed to work.
We’re going to start simple, with a colored rectangle view.
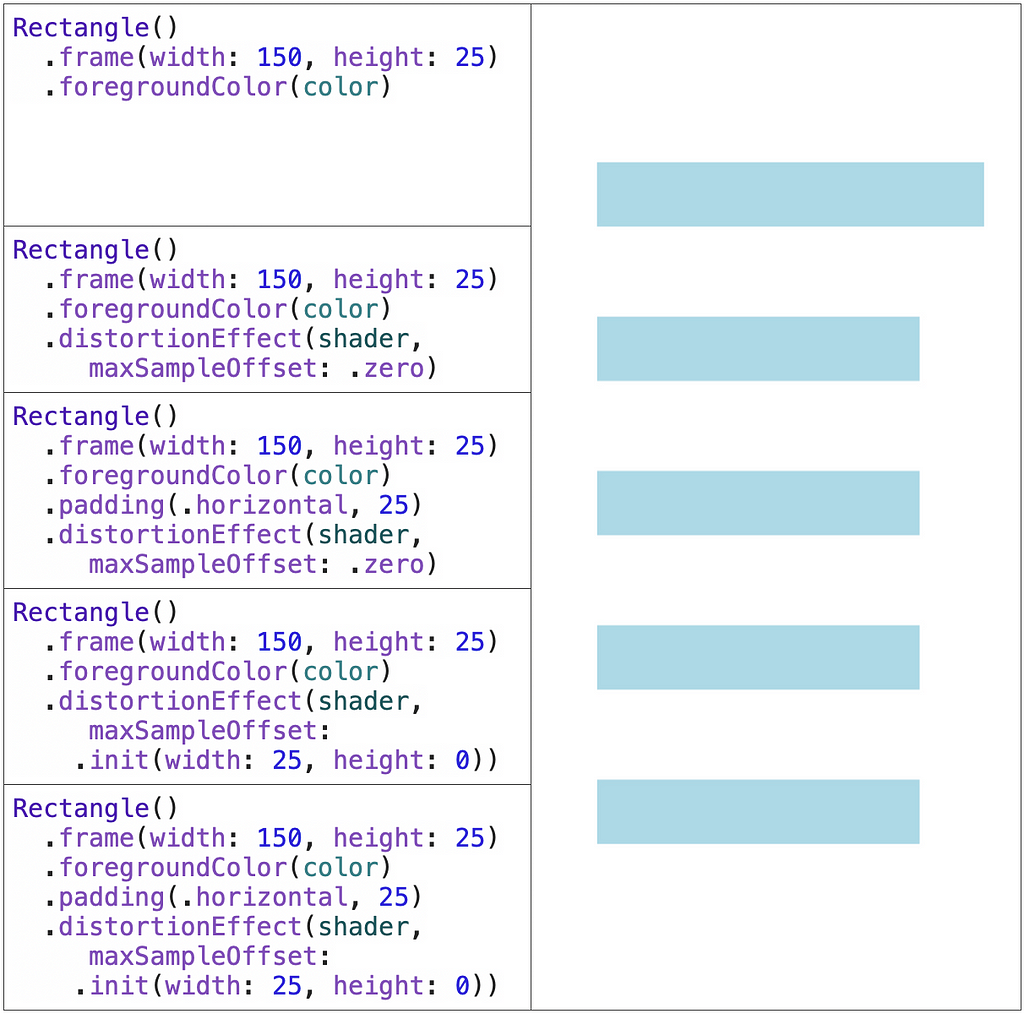
As you can see, applying the same shader to a rectangle with or without padding, and with or without positive sample offset, give the same effect. The view is only “moved” 25px to the left by cropping all the non-fitting pixels.
This happens because if the shader function tries to reach the pixels outside of the view, the destination pixel is just cropped. For the padded views, the pixels are present now. However, for some reason, the padding is not recognized as a part of the view to which the shader is applied.
The behavior is also completely the same whether the rectangles are embedded in the VStack (as long as the distortion effects are directly called on the views).
Now we’ll look at applying an effect to an HStack of two colored rectangles of size 50×25.
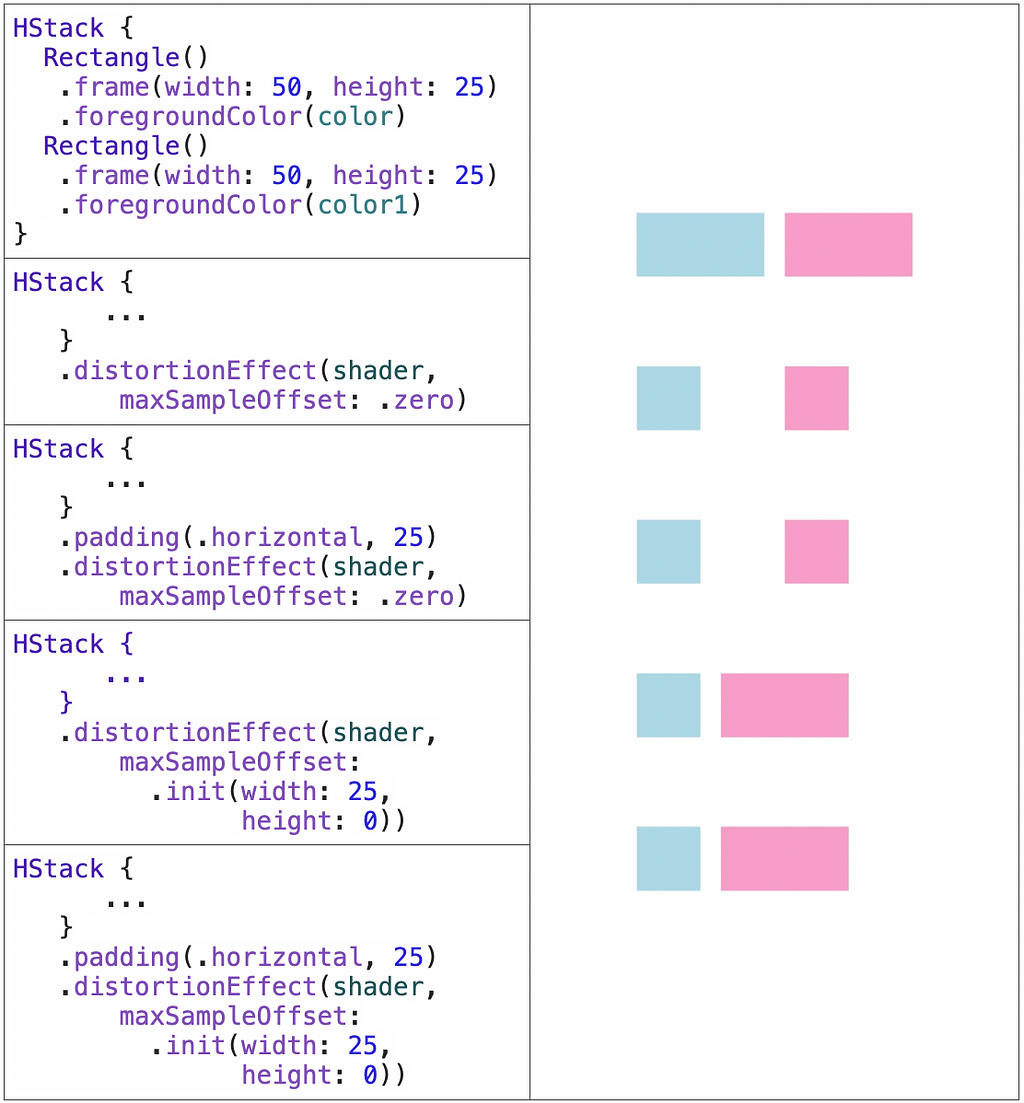
As you can notice, adding a positive value to a maxSample offset (4 and 5) helps our view look more complete: the pink part is not cropped. However, the blue part is still missing half of the pixels.
The reason is the same here as with the single rects; the padding is not part of the view. You can see that when debugging view hierarchy, the shaders are applied to views without paddings:
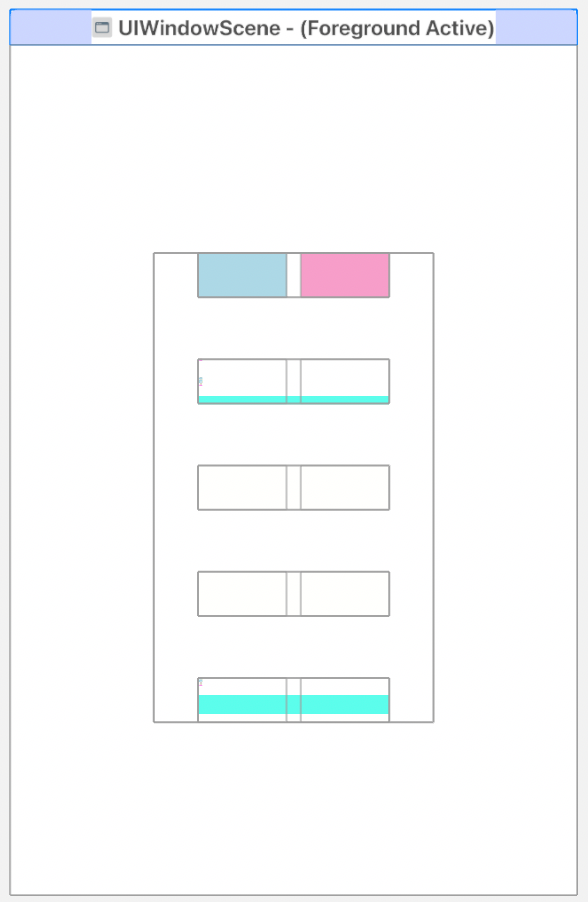
How can it be fixed? Well, there are different ways to do so.
Solutions
The first one is adding a background to your already padded view. This way, the whole element will be considered as a complete view.
We should also remember that if we want our view not to crop any parts, the maxSampleOffset parameter should have some relevant value.
HStack {
  Rectangle()
   .frame(width: 50, height: 25)
   .foregroundColor(color)
  Rectangle()
   .frame(width: 50, height: 25)
   .foregroundColor(color1)
}
.padding(.horizontal, 25)
.background(Color.brown.opacity(0.3))
.distortionEffect(shader, maxSampleOffset: .init(width: 25, height: 0))
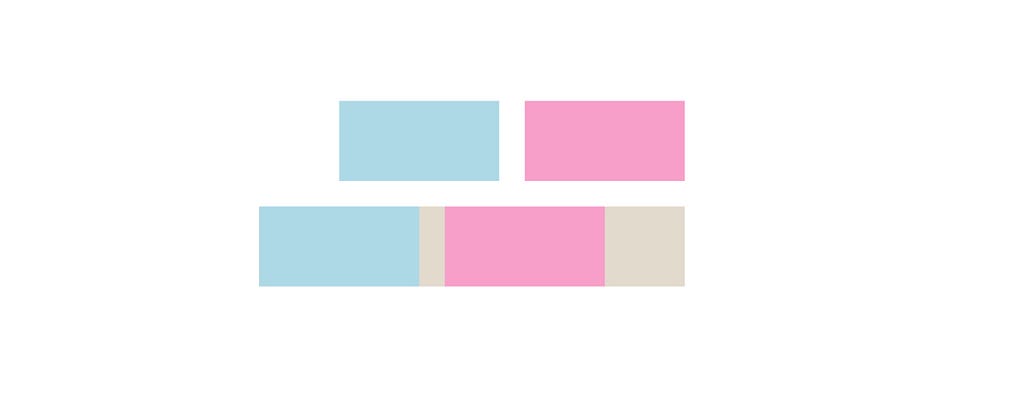
With a background color, your view is considered full now, and the shader is applied to all of it.
Note that if the pixel is outside of the colored part of the view, it may not be considered a part of it.
This conclusion also leads us to the next possible solution — adding a border to our view.
If you don’t want the background of your view to be colored, this would be the way. Now the parts of the view will be all inside of the border (including padding and the border itself).
HStack {
  Rectangle()
   .frame(width: 50, height: 25)
   .foregroundColor(color)
  Rectangle()
   .frame(width: 50, height: 25)
   .foregroundColor(color1)
}
.padding(.horizontal, 25)
.border(.gray, width: 0.5)
.distortionEffect(shader, maxSampleOffset: .init(width: 25, height: 0))
You can also set the border’s color to white or anything else corresponding to your view background (except for clear color because it’s not a color), so it will be “invisible.”

This all helps us understand the main idea of applying distortion and not cropping the pixels:
- The view should have a padding of a value no less than an effect’s max sample offset parameter.
- All view elements should be “grouped” in one view for a shader to be applied to all of them.
- The maxSampleOffset value of a distortion effect should be specified depending on a shader function’s return values.
If we focus on the grouping step of the process, we can come up with another solution, which would probably be the most suitable in a situation where you don’t need any borders or backgrounds — the drawingGroup modifier.
Universal solution
The drawingGroup modifier flattens a subtree of views into a single view before rendering it, which is exactly what we need in this situation.
Moreover, the process is powered by Metal in the background, which makes it fast.
HStack {
  Rectangle()
   .frame(width: 50, height: 25)
   .foregroundColor(color)
  Rectangle()
   .frame(width: 50, height: 25)
   .foregroundColor(color1)
}
.padding(.horizontal, 25)
.drawingGroup()
.distortionEffect(shader, maxSampleOffset: .init(width: 25, height: 0))

This way, to apply some shiny distortion effects without our views getting cropped, we need to follow the next steps.
- Add padding to the view.
- Add the modifier that groups the part of the view, such as the drawingGroup or else.
- Add some value to a maxOffsetParameter of the applied distortion effect.
What’s next?
This was an overview of the distortion effect for SwiftUI views. You can now apply this effect to different views and view combinations to achieve the needed results. You can also think of many Metal Shaders to implement and use as distortions.
Useful links
- Distortion effect
- Graphics and rendering modifiers
- Shader documentation in Xcode
SwiftUI and Metal was originally published in Better Programming on Medium, where people are continuing the conversation by highlighting and responding to this story.