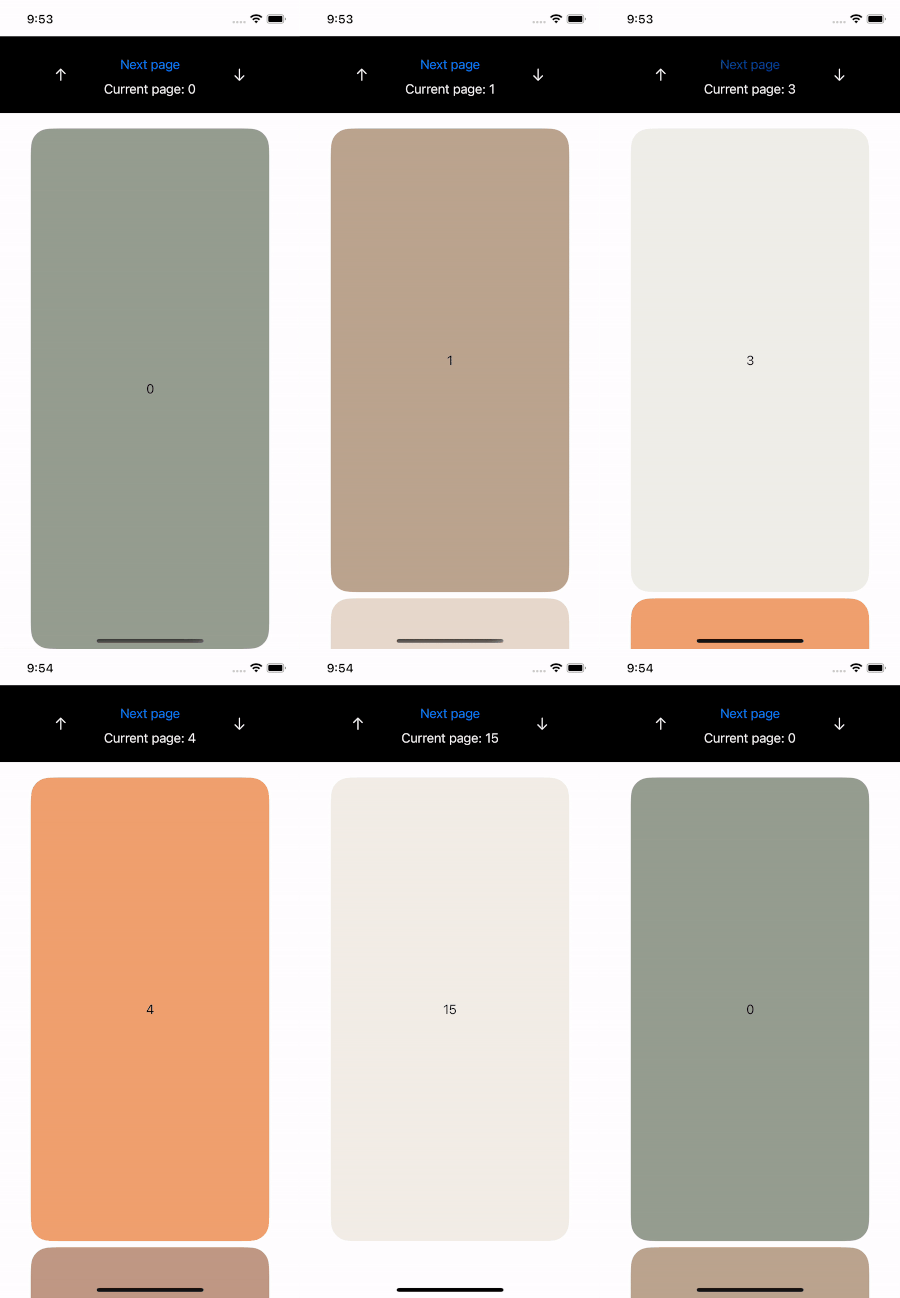
When looking into ways to implement UIKit’s setContentOffset(_:animated:) in SwiftUI, I’ve run into quite a few approaches. Some of them — such as using the id for ScrollView and redrawing the whole thing — are fairly creative, though rather excessive in 2023. Here I suggest much easier ways to set SwiftUI ScrollView offset programmatically.
Modern Approach for iOS 17.0+ Beta
For iOS17, Apple has introduced a new modifier scrollPosition(id:anchor:). It works beautifully with LazyVStack and LazyHStack, allowing you to scroll not only to the top or the bottom but to any view inside ScrollView. As the official documentation highlights:
Use the View/scrollTargetLayout() modifier to configure which the layout that contains your scroll targets.
Imagine the goal is to implement auto scroll to the bottom, to the top, and to a specific view inside the ScrollView. First, let’s create a basic viewModel to hold objects that LazyVStack / LazyHStack will be populated with.
import SwiftUI

final class ScrollViewContentModel: ObservableObject {

    // MARK: - Properties

    var contentItems: [ContentItem] = ContentItem.defaultContent()
}

struct ContentItem: Identifiable {

    // MARK: - Properties

    var id: Int

    var colour: Color

    // MARK: - Init

    init(id: Int, colour: Color?) {
        self.id = id
        self.colour = colour ?? .gray
    }

    static func defaultContent() -> [ContentItem] {
        let colours: [Color] = .randomColours()

        return colours.enumerated().map { iterator, colour in
            ContentItem(id: iterator, colour: colour)
        }
    }
}
For this article, the objects will only have id and colour. Then, we will need to create a view that holds viewModel and @State variable scrollPosition — that’s how ScrollView offset will be bound to a particular view to scroll to.
struct ContentView: View {

    // MARK: - Properties

    @StateObject var viewModel = ScrollViewContentModel()

    // 1. In the beginning,
   // the scroll offset is aligned with the first view of the scroll content
    @State private var scrollPosition: Int? = 0

    // MARK: - Body

    var body: some View {
        VStack(spacing: Constant.vstackSpacing) {
            buttonView

            ScrollView(.vertical) {
                LazyVStack {
                    ForEach(viewModel.contentItems) { item in
                        rectangleView(colour: item.colour, text: "(item.id)")
                            .containerRelativeFrame([.vertical, .horizontal])
                    }
                }
                // 2. Here we let the system know that
                // LazyVStack is layout target
                .scrollTargetLayout()
            }
            // 3. Here we specify that ScrollView should scroll to
           // the position of a particular view that is part of the layout target
            .scrollPosition(id: $scrollPosition)
            .safeAreaPadding(.horizontal, Constant.safeAreaPadding)
        }
        .safeAreaPadding(.bottom, Constant.safeAreaPadding)
    }
}
Then let’s create three buttons that will tell ScrollView to change its position — scroll to the very top, the bottom, or to the next view.
    private var buttonTop: some View {
        Button(action: {
              // 1. By making scrollPosition = 0,
             // we specify that scrollView should scroll up
            // to the first view of the target layout
            scrollPosition = 0
        }, label: {
            Image(systemName: "arrow.up")
                .foregroundColor(.white)
        })
        .padding(.horizontal, Constant.safeAreaPadding)
    }

    private var buttonBottom: some View {
        Button(action: {
            // 2. Here we specify that scrollView should scroll down
           // to the last view of the target layout
            scrollPosition = viewModel.contentItems.count - 1
        }, label: {
            Image(systemName: "arrow.down")
                .foregroundColor(.white)
        })
        .padding(.horizontal, Constant.safeAreaPadding)
    }

    // 3. Adding another button for scrolling to the next view
    private var nextViewButton: some View {
        Button("Next page") {
            scrollPosition = scrollPosition == nil ? 0 : (scrollPosition! + 1)
        }
    }

    // 4. Incorporating two buttons into a single view
   // that is added to the body
    private var buttonView: some View {
        ZStack {
            Color.black
            HStack {
                buttonTop
                VStack {
                  nextViewButton
                }
                .padding(5)

                  if let position = scrollPosition {
                      Text("Current page: (position)")
                          .foregroundColor(.white)
                  }
                }
                buttonBottom
            }
        }
        .frame(height: Constant.buttonViewHeight)
    }
Here’s the result:

The source code for this example lives here.
ScrollViewReader for iOS 14.0+
To support versions below iOS17, ScrollViewReader to the rescue! SwiftUI’s ScrollViewReader is a view that works with a proxy, adding scroll offset to show child views. Let’s recreate the previous example with ScrollViewReader. At first, we need to adapt buttons to receive ScrollView proxy.
    // 1. Passing proxy to the buttonView to be able to call proxy.scrollTo(id)
    private func buttonView(with proxy: ScrollViewProxy) -> some View {
        ZStack {
            Color.black
            HStack {
                // 2. Passing proxy to the top button
                topButton(with: proxy)

                VStack {
                    Button("Next page") {
                          // 3. When 'Next page' button is tapped,
                         // scroll should move to the child's id
                        if currentId < viewModel.contentItems.count - 1 {
                            proxy.scrollTo(currentId + 1)
                            currentId = currentId + 1
                        }
                    }
                    .padding(5)

                    Text("Current page: (currentId)")
                        .foregroundColor(.white)
                }

                // 4. Paassing proxy to the bottom button
                bottomButton(with: proxy)
            }
        }
        .frame(height: Constant.buttonViewHeight)
    }

    private func topButton(with proxy: ScrollViewProxy) -> some View {
        Button(action: {
            // When tapped, it scrolls to the first child view
            proxy.scrollTo(0)
            currentId = 0
        }, label: {
            Image(systemName: "arrow.up")
                .foregroundColor(.white)
        })
        .padding(.horizontal, Constant.safeAreaPadding)
    }

    private func bottomButton(with proxy: ScrollViewProxy) -> some View {
        Button(action: {
            // When tapped, it scrolls to the last child view
            let lastItemId = viewModel.contentItems.count - 1
            proxy.scrollTo(lastItemId)
            currentId = lastItemId
        }, label: {
            Image(systemName: "arrow.down")
                .foregroundColor(.white)
        })
        .padding(.horizontal, Constant.safeAreaPadding)
    }
As we tell ScrollView to base its offset off the views ids, we must set these ids for every child view. Let’s add them in ContentView:
    // MARK: - Properties

    @StateObject var viewModel = ScrollViewContentModel()

    @State var currentId: Int = 0

    // MARK: - Body

    var body: some View {
        VStack(spacing: Constant.vstackSpacing) {
            ScrollViewReader { proxy in
                buttonView(with: proxy)
                ScrollView(.vertical) {
                    LazyVStack {
                        ForEach(viewModel.contentItems) { item in
                            rectangleView(colour: item.colour, text: "(item.id)")
                                .containerRelativeFrame([.vertical, .horizontal])
                                // Seting id for every child view
                                // to let scrollView be based off it
                                .id(item.id)
                        }
                    }
                }
                .scrollDisabled(true)
                .safeAreaPadding(.horizontal, Constant.safeAreaPadding)
            }
        }
        .safeAreaPadding(.bottom, Constant.safeAreaPadding)
    }
This code will allow us to achieve the same auto-scrolling behaviour as if using the latest scrollPosition(id:anchor:).
The source code for this example is in this GitHub repository.
Happy coding!
Scroll Programmatically With SwiftUI ScrollView was originally published in Better Programming on Medium, where people are continuing the conversation by highlighting and responding to this story.