Nvidia VXGI + Unity: Voxel-based Rendering Demo Using Direct3D 12 Graphics Backend
Voxel-based global illumination is a set of techniques that exploits the voxel representation of the scene. Voxels can contain different metrics: for example, the amount of light reflected off the geometry they represent.
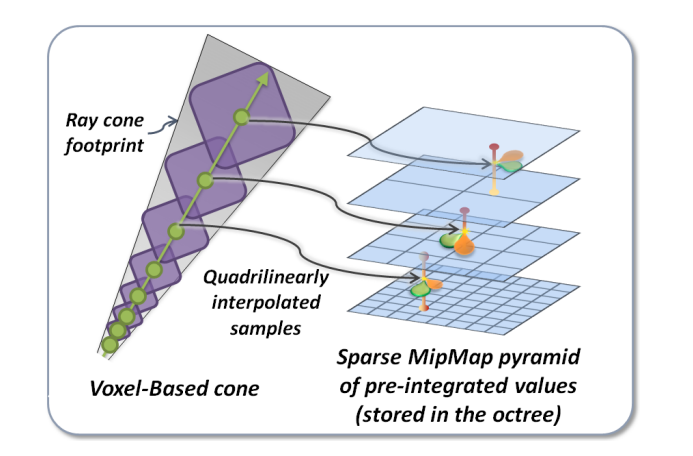
When voxels are stored in mipmap-like data structures such as sparse voxel octree it allows us to rapidly evaluate the metrics for the volume of space. This process is usually implemented via Voxel Cone Tracing: the idea is to step along the cone axis and perform multiple lookups into the voxel’s hierarchical data:
For example, “The Tomorrow Children” uses voxel cone tracing to render indirect illumination effects:
In this test project, I’ll try integrating one of its implementations — Nvidia VXGI — into Unity. Here are titles that use this framework:
“Rise of Tomb Raider”
“Final Fantasy XV”
Voxelization
Under the hood Nvidia VXGI uses 3D clipmaps and 3D texture mipmaps instead of octrees. 3D clipmaps are very similar to usual 3D textures with multiple levels of detail but 3D clipmaps cover different pieces of space at different LODs.
When such clipmap is centered around the camera, its finer LODs cover regions that are close to the camera, and coarser LODs cover larger areas that are further away.
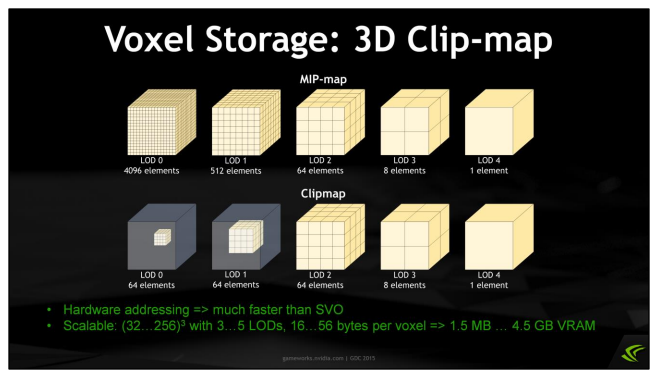
For this test project, only opacity voxels will be used. Opacity voxels represent geometry density within voxel. For example, a cube whose size matches one voxel will produce a fully opaque voxel. But after downsampling, in the next coarser LOD, the opacity of the enclosing voxel will be only 25%. One more level up and it’s only 6.25%, and so on.
To perform voxelization, we render the scene with special matrices, geometry, and pixel shaders provided by VXGI, at a resolution equal to the clipmap size.
- Prepare voxelization for the current frame
auto cameraFwdF = reinterpret_cast<const XMFLOAT3*>(cameraToRender->State.CameraFwd);
auto cameraPosF = reinterpret_cast<const XMFLOAT3*>(cameraToRender->State.CameraPos);
XMVECTOR camFwdV = XMLoadFloat3(cameraFwdF);
XMVECTOR camPosV = XMLoadFloat3(cameraPosF);
XMVECTOR centerV = camPosV + camFwdV * VXGI_FINEST_VOXEL_SIZE * float(VXGI_MAP_SIZE) * 0.25f;
XMFLOAT3 centerF;
XMStoreFloat3(¢erF, centerV);
VXGI::UpdateVoxelizationParameters params;
params.clipmapAnchor = VXGI::float3(centerF.x, centerF.y, centerF.z);
params.finestVoxelSize = VXGI_FINEST_VOXEL_SIZE;
VXGI::ComputeVoxelizationViewParametersInput cvvpi;
cvvpi.clipmapAnchor = params.clipmapAnchor;
cvvpi.finestVoxelSize = params.finestVoxelSize;
cvvpi.mapSize = VXGI::uint3(VXGI_MAP_SIZE);
cvvpi.stackLevels = VXGI_STACK_LEVELS;
VXGI::VoxelizationViewParameters viewParams;
VXGI::VFX_VXGI_ComputeVoxelizationViewParameters(cvvpi, viewParams);
bool performOpacityVoxelization = false;
bool performEmittanceVoxelization = false;
auto status = _gi->prepareForVoxelization(
params,
performOpacityVoxelization,
performEmittanceVoxelization);
- Render scene to update its voxel representation
if (performOpacityVoxelization)
  {
   VXGI::float4x4 voxelizationMatrix = viewParams.viewMatrix * viewParams.projectionMatrix;

   cameraToRender->PrepareVoxelizationRendering(&voxelizationMatrix);

   _renderInterface->beginRenderingPass();
   _gi->beginVoxelizationDrawCallGroup();

   for (auto& ro : objectsToRender)
   {
    ro.Render(cameraToRender->DrawCallState.get());
   }

   _gi->endVoxelizationDrawCallGroup();
   _renderInterface->endRenderingPass();
  }

  _renderInterface->flushCommandList();
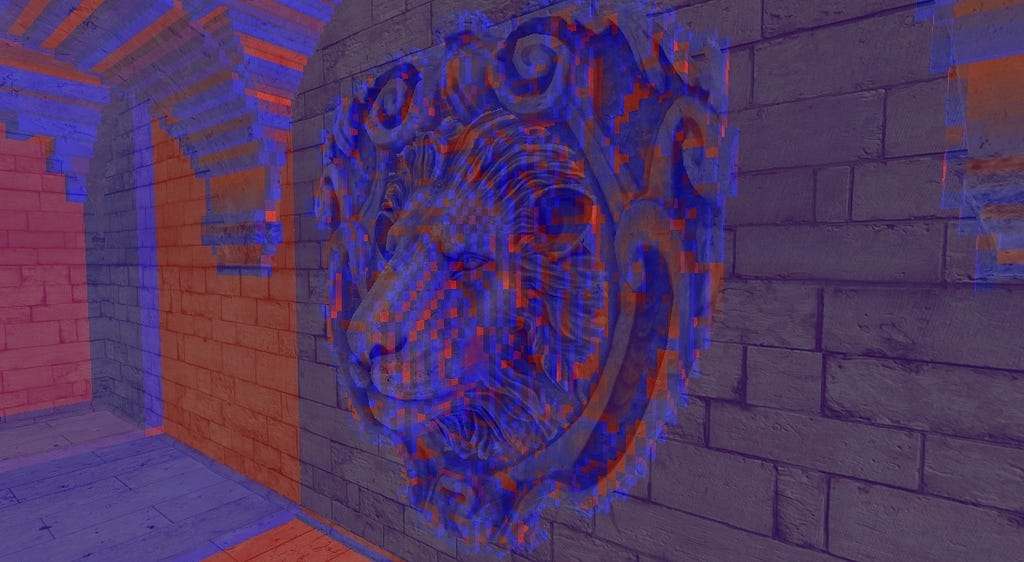
Voxels visualization (low-opacity voxels are blue, high-opacity voxels are red)
Ambient occlusion
- Screen-space ambient occlusion (SSAO)
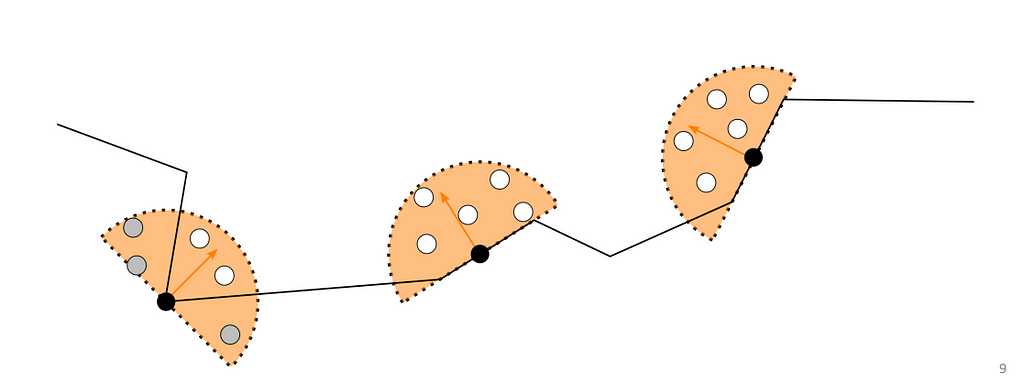
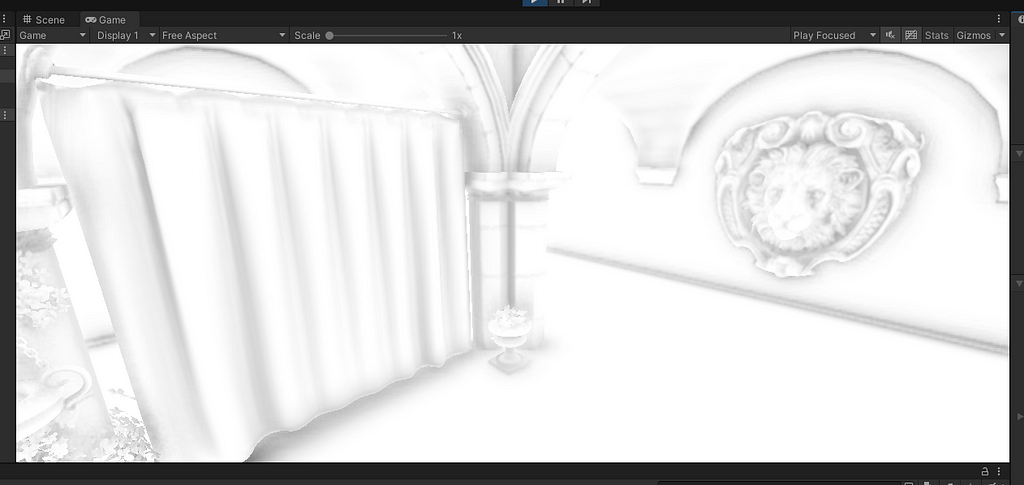
The basic idea is quite simple: to calculate the final ambient light intensity in a full-screen pass for each surface point, we just need to perform multiple depth tests within the normal-oriented hemisphere:
Native plugin code
//...
  VXGI::IBasicViewTracer::InputBuffers inputBuffers;

  inputBuffers.gbufferViewport = viewport;
  inputBuffers.gbufferDepth = _depthHandle;
  inputBuffers.gbufferNormal = _normalsHandle;

  memcpy(&inputBuffers.viewMatrix, &viewMatrix, sizeof(viewMatrix));
  memcpy(&inputBuffers.projMatrix, &projectionMatrix, sizeof(projectionMatrix));
//...
//tracer is an object to perform voxel cone tracing on LOD clipmaps
_tracer->computeSsaoChannelBasic(ssaoParams, inputBuffers, ssao);
//..
And how it looks:
- Voxel ambient occlusion (VXAO)
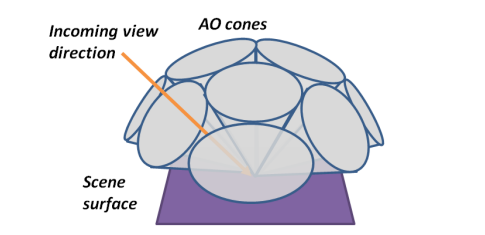
To compare with SSAO: instead of multiple depth tests over the normal-oriented hemisphere, multiple cones were traced to evaluate occlusion via opacity voxels.
Native plugin code
//...
   VXGI::BasicDiffuseTracingParameters diffuseParams;
   diffuseParams.quality = State.VXAOQuality;
   diffuseParams.directionalSamplingRate = State.VXAOSamplingRate;
   diffuseParams.ambientRange = State.VXAORange;
   diffuseParams.interpolationWeightThreshold = 0.1f;
   diffuseParams.ambientScale = State.VXAOScale;
   diffuseParams.enableTemporalReprojection = false;
   diffuseParams.enableTemporalJitter = false;

//tracer is an object to perform voxel cone tracing on LOD clipmaps
   auto status = _tracer->computeDiffuseChannelBasic(diffuseParams, inputBuffers, nullptr, vxao, confidence);
//...
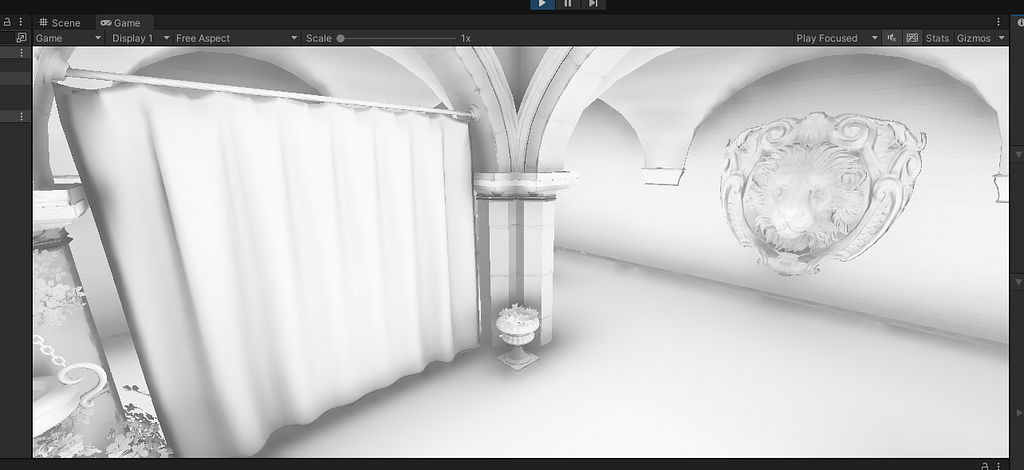
VXAO result
- VXAO + SSAO
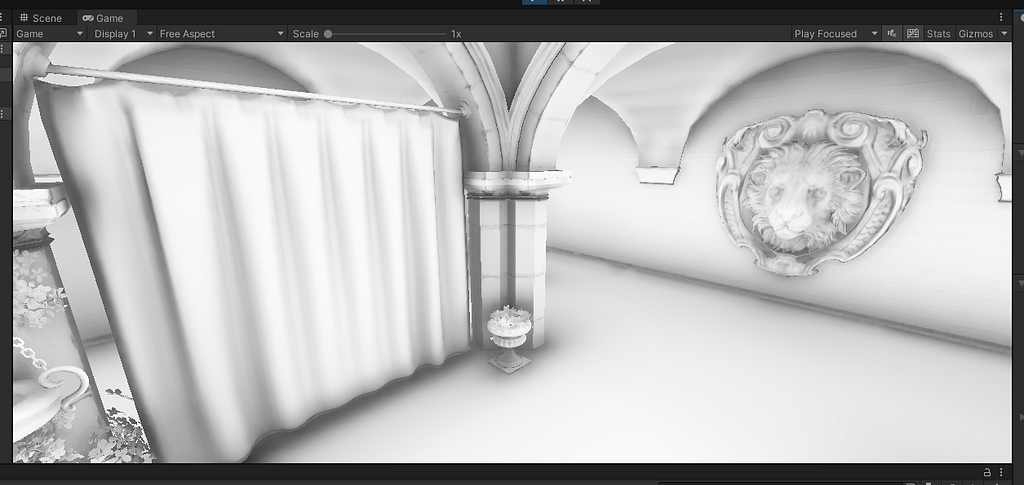
Results
Source code
https://bitbucket.org/maxpushkarev/vxgi/src/master/
Nvidia VXGI + Unity: Voxel-based Rendering Demo Using Direct3D 12 Graphics Backend. was originally published in Better Programming on Medium, where people are continuing the conversation by highlighting and responding to this story.