This article will provide a comprehensive guide on setting up a Node.js server and integrating it with a PostgreSQL database using the Knex SQL query builder, all within the Express.js framework

In today’s data-driven world, setting up a reliable, efficient, and scalable server is crucial for any web application. As technology evolves, a combination of Node.js, PostgreSQL, Express, and Knex.js has emerged as an increasingly popular stack for server-side development.
In this article, we will guide you through a comprehensive setup of a Node.js server integrated with a PostgreSQL database, using the Express framework for easy route handling and the Knex.js SQL query builder for clear and concise database operations. Whether you are a seasoned developer or just beginning your journey, this guide will equip you with the knowledge and skills to leverage these powerful technologies to create a robust backend infrastructure.
I have deliberately skipped the explanations of how to build a project, how to use TypeScript and Webpack, what Node.js is, and so on.
Here’s the link to the GitHub repo.
We’ll focus on the essence and important aspects of designing a service with these tools, but I want to provide some information about the tools we will use in our server.
Express.js is a web application framework for Node.js. It simplifies tasks, provides a simple way to design a server with its flexible and modular architecture, and is used for building web applications and APIs.
Knex.js is a comprehensive SQL query builder that emphasizes flexibility, portability, and ease of use. It offers a uniform API across different database systems and incorporates features that handle transactions, data migrations, and seeding. With Knex.js, we can construct SQL queries using JavaScript, which can be executed on any supported database system.
PostgreSQL is a freely available object-relational database management system. It augments the SQL language with broad capabilities to accommodate and scale complex data processes securely.
Postgres installation
Docker will be our tool of choice in our endeavor to utilize Postgres. Therefore, verifying the Docker installation has been carried out successfully is imperative. Here’s how to do that:
- Pull the PostgreSQL image: docker pull postgres
- Create and run a Docker container: docker run –name my-name-postgres -e POSTGRES_PASSWORD=MyPassword -p 5432:5432 -d postgres The POSTGRES_PASSWORD is the environment variable that sets the password for the default PostgreSQL superuser postgres. Replace my-name-postgres and MyPassword with a preferred container name and secure password. When you run a PostgreSQL Docker container, a superuser named postgres is automatically created, and the POSTGRES_PASSWORD you provide is assigned as its password.
- At this step, we have to be able to connect to Postgres docker exec -it my-name-postgres psql -U postgres
- Create a user CREATE USER myuser WITH PASSWORD ‘mypassword’; Replace myuser and mypassword with your desired username and password.
- We have to grant the user superuser privileges: ALTER USER myuser WITH SUPERUSER;
- And now, create a new database: CREATE DATABASE mydatabase; Substitute mydatabase with the name of the database you prefer.
- And eventually, grant all privileges on the new database to the new user: GRANT ALL PRIVILEGES ON DATABASE mydatabase TO myuser;
Now you can connect to your database using your username and password: docker exec -it my-name-postgres psql -U myuser -d mydatabase.
Environment variables
Our variables will be accessible and usable in the Knex file configuration and for setting up the server. Create .env file in the root of the project with the following variables:
Node server installation
For the server installation, we are going to use yarn and Node JS 18, so be sure you have installed this already and done the installation steps.
Create server folder: mkdir knex-postgres-boilerplate then cd knex-postgres-boilerplate and yarn init -y and check that main corresponding to src/index.ts
Add .nvmrc file with the following content:
v18.13.0
Inside the folder, install packages for the server:
"dependencies": {
  "body-parser": "^1.20.2",
  "cors": "^2.8.5",
  "dotenv": "^16.3.1",
  "express": "^4.18.2",
  "knex": "^2.5.1",
  "pg": "^8.11.1"
}
In src we gonna have index.ts as an entry point for our server with the following content:
Start your server by running yarn dev, then verify it executes smoothly. In my case, I ensured the server outputs the expected result without any errors or issues:
Server is running on port 9000
It’s time to initiate our Knex configuration if everything is in order.
Knex configurations
Let’s create knexfile.ts in the root of our knex-postgres-boilerplate folder. This file configures Knex, a SQL query builder and migration tool for Node.js. It provides the necessary settings and options to establish a connection to the database, define migration and seed directories, specify the database client, and more.
The migrations property defines where migration files are located and the name of the database table where migration information will be stored.
The seeds property defines the configuration for database seeding with the location of the folder.
The pool property is used to configure connection pooling settings for the Knex database connection. Connection pooling is a technique that allows database connections to be reused rather than creating a new connection for every database operation.
Now, let’s create mkdir database and inside src folder create file index.ts with the following content:
The knexfile.ts configuration is used to create a Knex instance and export it as database depends on the environment.
Before making migrations let’s add to database folder two additional folders: mkdir migrations seeds.
Knex migrations
Migrations are essential for maintaining version control of the database schema, ensuring consistency and traceability over time. Migrations keep track of changes, allow for reversions, and maintain consistency across different environments. They automate schema updates, promote team collaboration, and are essential for handling data transformation and evolving a database schema as an application grows.
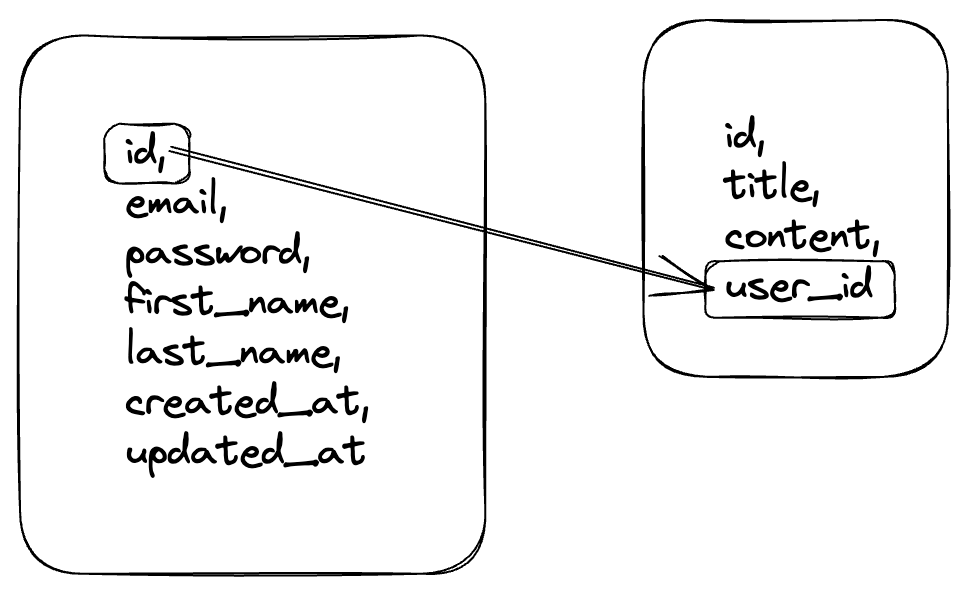
In our case, we need to create two tables, users and posts, with posts having a user_id that references users as user.id. For that, we are going to create two migrations, as shown below:

Run the following command to create a migration for the users table:
npx knex migrate:make create_users_table
This will create a file in migrations directory. When we run the command npx knex migrate:make create_users_table, we’re creating a new migration file – we’re not actually running the migration yet. This file contains the instructions for changing our database schema, but no changes have been made so far. Check that file in the migrations folder.
Both up and down functions defined in each Knex migration file that describes how to apply and undo a migration, respectively.
up — function contains the changes to make in the database, such as creating tables, adding columns, or changing data types. When run npx knex migrate:latest, Knex executes the up function of each pending migration. How does Knex understand which migration is pending? Knex tracks which migrations have been run by using a special table in the database, usually named knex_migrations (this can be configured). This table is automatically created the first time migration is launched. It stores metadata about each migration, including the name of the migration file and when it was run.
down — function reverses the changes made in the up function. It’s essentially a way to undo or rollback a migration. This function is run by execution npx knex migrate:rollback.
Having both up and down migrations ensure our database schema changes are reversible. Those functions help maintain consistency and predictability.
Now, let’s add to our first migration file for users table the following content:
The timestamps method creates created_at and updated_at fields and sets them to use the current time as default.
Here’s how to see the time to run in the terminal:
npx knex migrate:latest
and the output will be something like Batch 1 run: 1 migrations.
As a result of the migration, the table, users, is in the database, and so are the knex_migrations and knex_migrations_lock tables. That table in Knex ensures only one database migration occurs at a time, preventing simultaneous migrations that could cause database inconsistencies. Pretty cool, right?

After the users table is set up, we can create a migration for the posts table:
npx knex migrate:make create_posts_table
This will create another file in the migrations directory, and we can edit this file as follows:
In this migration file, user_id, is a foreign key referencing the id in the users table. It establishes a link between a post and the user who created the post. The .unsigned().notNullable() constraint ensures this field only contains non-negative values and cannot be left empty or null, supporting your data’s integrity.

After all the migrations have been run and the database schema is set up, we can seed our database.
Knex seeds
Seeds in a database context are initial sets of data for an application. Seeds are used to populate the database with default or test data. This is helpful during the development and testing stages, as it allows us to work with test data-driven functionality without having to input data each time for each table manually.
For the Knex seed, run npx knex seed:make 01-users. This will create a scaffold seed file. The number in the name 01- necessary for the sequence of seeds.
Here’s the code to change the content of that template file:
And here’s the code to make posts using this command: npx knex seed:make 02-posts
Other seed files have to be 03-, 04-, 05-, etc. This will create this sequence. First, it will seed the users table, then posts. When that’s done, you can run the following command in the terminal:
knex seed:run
And check the two tables in the database.


Routes
Now, let’s create routes enabling our server to expose data from the database. To organize our routes, we’ll prefix them under api/v1. Before defining the routes, we need to set up the middleware for the router to handle requests to that specific route. For that, we have to update our index.ts server file with this code:
Next, create a new folder named src/router and within it, create an index.ts file. This file will serve as the entry point for our router, where we’ll define our initial route, a health check route.
Now, open the Postman (or use other tools) to check the route for getting the request: localhost:9000/api/v1/health. It has to send ok with status 200.
When that’s done, we can add a couple of simple routes that will consume data from the users and posts tables.
To retrieve data from tables, we must create models to serve as the interface for accessing and retrieving data.
Models
Models are essential for abstracting database operations, validating data, implementing business logic, and ensuring code reusability and maintainability. They simplify testing, improve portability, and establish a consistent interface for interacting with the database, resulting in efficient and reliable data management within the application. The first model we are going to create will be a base model. Then we’ll use the model in other models like UserModel or PostModel.
Let’s create the src/models folder and put touch Model.ts UserModel.ts PostModel.ts inside it. After that, we can add the following content to Model.ts:
This Model.ts file defines a generic base model class that provides common database operations using Knex. It serves as a reusable foundation for creating specific models like the UserModel. By extending this base model, specific models like the UserModel can inherit the common methods and focus on implementing model-specific functionality. This promotes code reusability, reduces duplication, and helps maintain a consistent approach to database operations across different models in the application.
As you can see, we use almost all of our base methods in database table manipulation. Let’s reuse it in UserModel:
The user model inherits all the methods from the base model, enabling us to retrieve user data from the database easily. For this, let’s go back to the router and change the code inside the /users route:
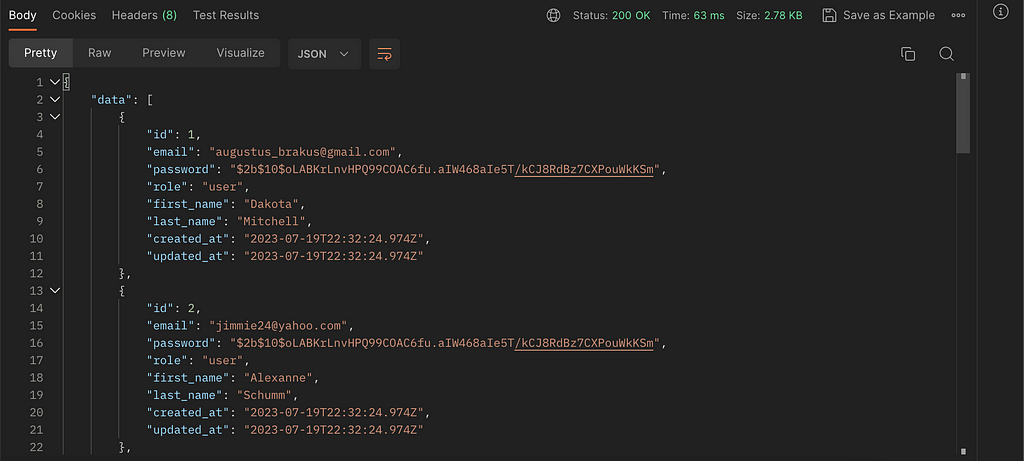
Check the response for GET localhost:9000/api/v1/users

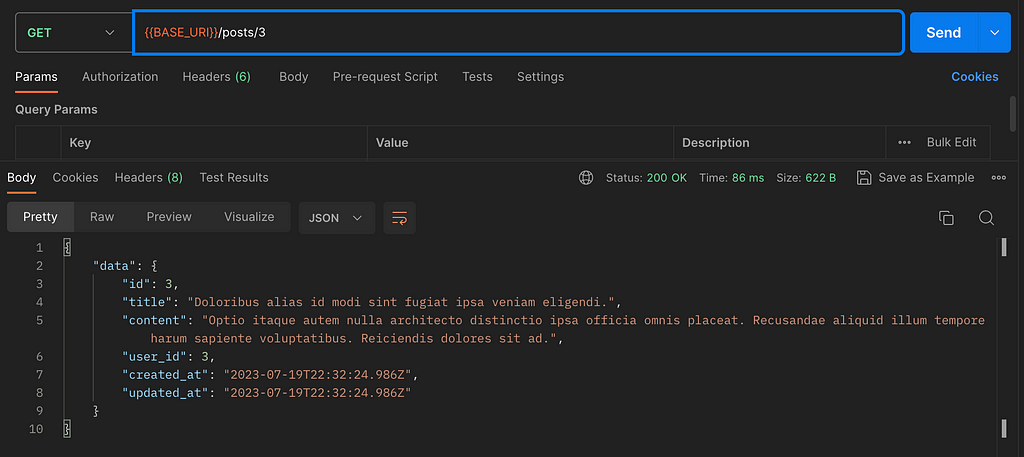
In the same way, we can handle the request for posts by id. Let’s update the route with this code:
And add the following code to the PostModel.ts:
The PostModel extends the Model class, inheriting its methods for performing common database operations. This model represents a post in the application. The tableName property specifies the database table name as posts. By utilizing the PostModel, we can interact with the posts table and leverage the inherited methods for data retrieval, insertion, updating, and deletion.
Finally, here is the result of GET request to localhost:9000/api/v1/posts/3.

Similarly, the models allow us to perform update, delete, and insertion operations on the table, enabling us to modify or add new entries easily.
Expanding those models can involve implementing functionality for handling other requests, establishing relationships and joins between models, enhancing data validation and sanitization, incorporating pagination and sorting, creating custom query methods, and adding middleware for authorization.
Conclusion
You can create a powerful and scalable server-side application by combining Knex for seamless database interactions, Express.js for building the server, and models for data abstraction and organization. My approach enhances code structure, simplifies database operations, promotes code reusability, and enables efficient data handling.
Of course, I gave some bare insights about how to build a service with those tools initially, and it’s up to you for further usage and needs.
I am open to receiving any suggestions and discussing various aspects.
References
How to Create Node.js Server With Postgres and Knex on Express was originally published in Better Programming on Medium, where people are continuing the conversation by highlighting and responding to this story.