A proof of concept to build offline-first iOS apps
Since Apple announced the new SwiftData framework at WWDC23, I’ve been SUPER eager to try it out. It’s a new framework that matches SwiftUI’s style and makes working with persistent data (CoreData) much easier. Now that it’s out of beta, I spent an hour messing around with it and put together a quick proof-of-concept using this brand-spanking-new framework.
I specifically wanted to see how easy it would be to conform a persistent data model to the Codable protocol to make working with remote and local persisted data easier.
The following approach could be helpful if you’re building an offline-capable iOS app that works with remote data, persists on the device, and syncs with the server when connected to the internet.
The Problem
Traditionally, when building an iOS app that needs to work with remote data and persist that data on the device, we would have to do a lot of stuff. Some of it includes creating the CoreData model and mirror structures that conform to Decodable. For example, if we have a CoreData model called Person that looks like this —
class Person: NSManagedObject {
    @NSManaged var id: Int
    @NSManaged var name: String
    @NSManaged var age: Int
}
we would also need to create a struct that mirrors this model when decoding our remote data. That will look like this:
struct PersonRemote: Codable {
    let id: Int
    let name: String
    let age: Int
}
If your model has a ton of member variables, this could become cumbersome and create errors. Also, this approach isn’t the driest. What if we could define our models once and be good to go?
We can.
Before we start, it’s worth noting that a little duplication is okay, especially if it makes things easier to work with and maintain. We will see how “dry” we can get our models with SwiftData.
Note: I also want to emphasize that the app we’re about to build is a prototype and may not necessarily adhere to “best practices” nor be totally thread-safe.
Previous Approach
As proposed in Decodable CoreData, we could use the Codable protocol to decode our remote data into our CoreData models. This was great because we didn’t have to write a lot of duplicate code and could use the same model for CoreData and decoding our remote data. This approach works. However, it has the following notable drawbacks:
- Context/thread safety is very fragile.
- Too many “hacky” workarounds related to JSONDecoder and JSONEncoder
SwiftData Approach
Like SwiftUI, SwiftData is declarative and uses many of the same concepts. For example, we can declare our persistent data model like this:
import SwiftData

@Model
struct Person {
    let id: Int
    let name: String
    let age: Int
}
Boom. That’s it. We don’t need to create a CoreData model or anything. SwiftData will automatically create the model for us.
The Fun Part
OK, now that we’ve got an idea of SwiftData and the problem we’re trying to solve, let’s start coding!
If you want to skip all of this, I’ve put together a sample application with the final code. You can find it on GitHub.
Prototype features
- Fetch remote data
- Persist remote data on the device
- Sync local data with remote data source
It’s important to note that for the scope of this POC, we will not build functionality that supports local posts or syncing them with a remote server. The remote server is the source of truth!
Project Setup
System Requirements
- Xcode 15
- iOS 17 SDK
- Nodejs LTS (currently v18)
First, we need to create a new Xcode project.
Open Xcode.
Click Create New Project and select iOS.
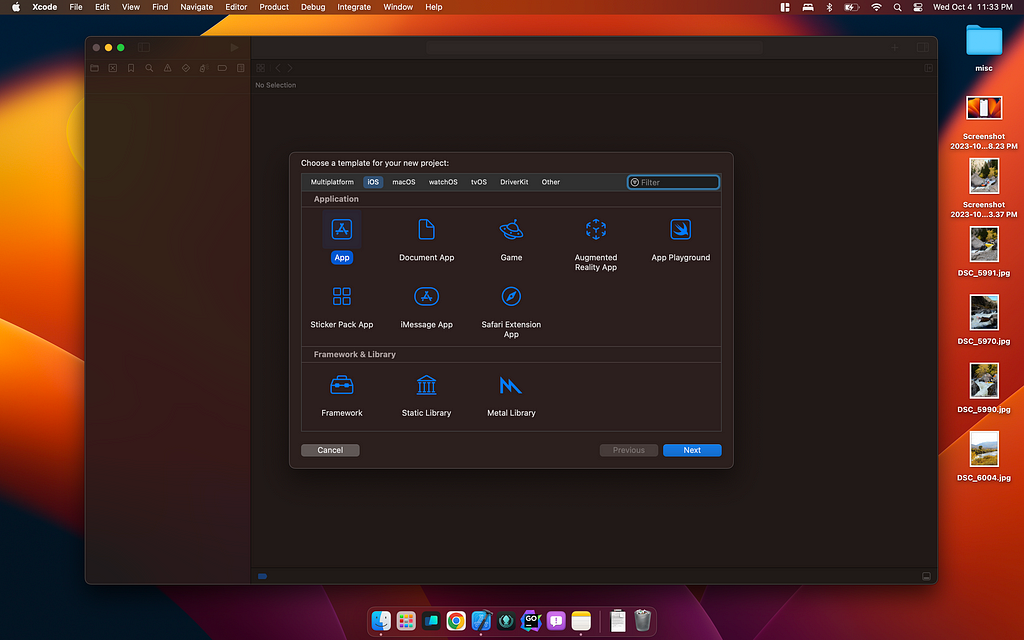
Next, I’m going to call mine SwifDataExploration. I will also select SwiftUI as the user interface and SwiftData as the storage option. This will add a few things to our project, including a default model called Item.
We’ll delete this later.

Remote Data
Next, we need to create a remote data source. For this example, we will use a mock API that returns a list of posts. For our server, we’ll use json-server.
From the project root, run the following commands:
npm init -y
npm install --save-dev json-server
Next, create a file called db.json in the project root, and add the following:
{
  "posts": [
    {
      "id": 1,
      "title": "Post 1",
      "author": "Johnny Appleseed"
    }
  ]
}
Next, add this start script to the package.json file that will run the mock server:
{
"scripts": {
  "start": "json-server --watch db.json"
  }
}
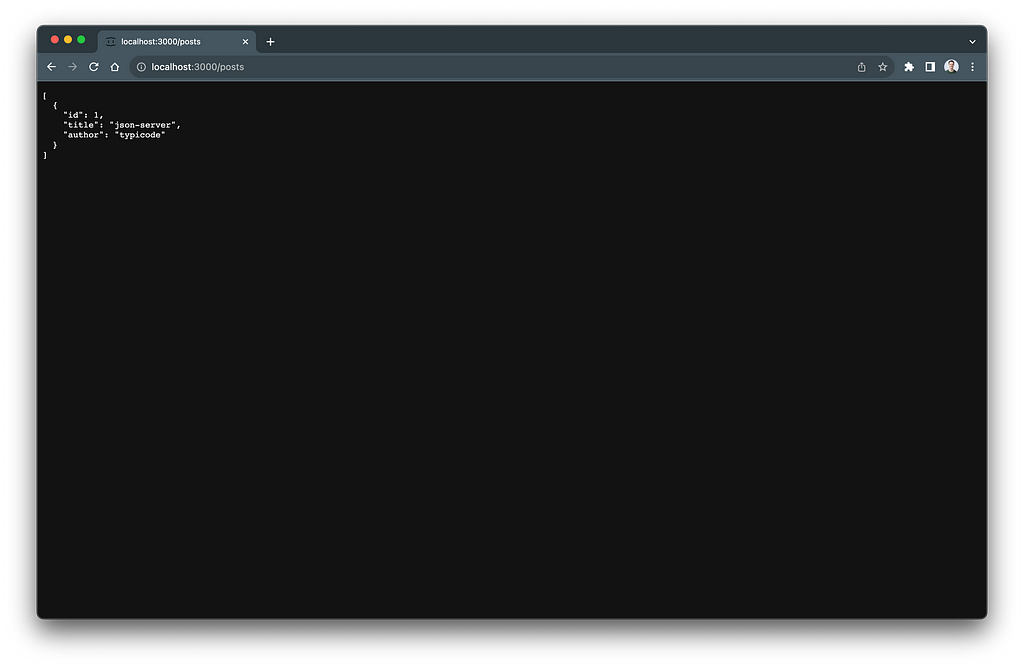
Now, open the terminal, navigate to the project root, and run npm start to bring up the dev API. To verify this works, open your browser and go to localhost:3000/posts. You should see something like this:
Local Data Model
Next, we need to create our local data model. Create a new file called PostModel that contains the following:
// PostModel.swift
import SwiftData

@Model
class Post {
    let id: Int
    let title: String
    let author: String
}
Now, let’s add this model to our schema. In the SwiftDataExplorationApp.swift file, you’ll see the following variable:
    var sharedModelContainer: ModelContainer = {
        let schema = Schema([
            Item.self,
        ])
        let modelConfiguration = ModelConfiguration(schema: schema, isStoredInMemoryOnly: false)

        do {
            return try ModelContainer(for: schema, configurations: [modelConfiguration])
        } catch {
            fatalError("Could not create ModelContainer: (error)")
        }
    }()
Replace Item.self with Post.self.
Now, in the ContentView.swift file, replace the Item model with Post. Here’s what that looks like:
@Query private var items: [Item]

// replace with

@Query private var items: [Post]
Fix the compiler errors that will pop up in the ForEach and do the same in for the preview. Your code should look like this:
#Preview {
    ContentView()
        .modelContainer(for: Item.self, inMemory: true)
}

// replace with

#Preview {
    ContentView()
        .modelContainer(for: Post.self, inMemory: true)
}
Let’s remove the boilerplate code, including addItem and deleteItems functions and the .onDelete and .toolbar modifiers.
Great. Now, we have our local data model setup and UI components for the scope of the POC. Next, we need to fetch our remote data.
Fetching Remote Data
Before fetching and decoding our remote data, our model must conform to the Codable protocol (really just Decodable). We can do this by making a few adjustments to our Post model:
@Model
class Post: Codable {
    // other stuff...

    required init(from decoder: Decoder) throws {
        let container = try decoder.container(keyedBy: CodingKeys.self)
        self.id = try container.decode(Int.self, forKey: .id)
        self.title = try container.decode(String.self, forKey: .title)
        self.author = try container.decode(String.self, forKey: .author)
    }

    func encode(to encoder: Encoder) throws {
        var container = encoder.container(keyedBy: CodingKeys.self)
        try container.encode(self.id, forKey: .id)
        try container.encode(self.title, forKey: .title)
        try container.encode(self.author, forKey: .author)
    }

    enum CodingKeys: CodingKey {
        case id, title, author
    }
}
Incredible. In just a few short steps, we’ve created our local data model and made it conform to Codable without any goofy hacks.
Create a new file called PostService.swift with a struct called PostService, and add the following method:
    static func getPosts() async throws -> [Post] {
        let url = URL(string: "http://localhost:3000/posts")!

        let session = URLSession.shared

        // Make the network request
        let (data, response) = try await session.data(from: url)

        // Check for HTTP errors
        guard let httpResponse = response as? HTTPURLResponse, httpResponse.statusCode == 200 else {
            throw URLError(.badServerResponse)
        }

        // Decode the data into an array of Post
        let decoder = JSONDecoder()
        let posts = try decoder.decode([Post].self, from: data)

        return posts
    }
Now, in the ContentView.swift file, add a .task modifier to the NavigationSplitView:
NavigationSplitView {
    // stuff
}.task {
    do {
        let posts = try await PostService.getPosts()
        print(posts)
    } catch {
        print(error.localizedDescription)
    }
}
Run the app, and you should see the following in the console:
[SwiftDataExploration.Post(id: 1, title: "Post 1", author: "Johnny Appleseed")]
Persist Remote Data
Now that we have our remote/local data model set up, let’s save it to the device.
Create two new files: ModelRepository.swift and PostRepository.swift.
The ModelRepository.swift file will provide a generic interface for our local models that can be used inside and outside SwiftUI views. Future state thinking, but whatever.
Inside the ModelRepository.swift file, add the following:
import SwiftData

struct ModelRepository<Model: PersistentModel> {
    private let context: ModelContext

    init(context: ModelContext) {
        self.context = context
    }

    func getAll() throws -> [Model] {
        let params = FetchDescriptor<Model>()
        let result = try context.fetch(params)
        return result
    }
}
Now, in the PostRepository.swift file, we’ll create an interface for our Post model that uses the ModelRepository, then add a sync method to sync our local data with the remote data source.
Here’s the code:
import SwiftData

struct PostRepository {
    private let repository: ModelRepository<Post>

    init(context: ModelContext) {
        self.repository = ModelRepository(context: context)
    }

    func sync(_ remotePosts: [Post]) throws -> [Post] {
        do {
            var localPosts = try repository.getAll()
            print(localPosts)
        } catch {
            print(error.localizedDescription)
        }
    }
}
Back in the ContentView.swift file, let’s adjust our .task modifier to use the PostRepository. Here’s what that looks like:
.task {
    do {
        let postRepository = PostRepository(context: modelContext)
        let remotePosts = try await PostService.getPosts()
        postRepository.sync(remotePosts)
    } catch {
        print(error.localizedDescription)
    }
}
Run the app. You should see an empty array in the console. That’s because we haven’t added any posts to our local data store yet. Let’s do that now.
In ModelRepository.swift, add the following methods:
/// Add models to the local data store
func create(_ models: [Model]) {
    for model in models {
        context.insert(model)
    }
}

/// Save changes made to the local data store
func save() throws {
    if context.hasChanges {
        try context.save()
    }
}
Then, back in the PostRepository.swift file, add the following to the sync method:
func sync(_ remotePosts: [Post]) throws -> [Post] {
    do {
        var localPosts = try repository.getAll()
        print(localPosts)
        repository.create(remotePosts)

        try repository.save()

        // verify that the posts were saved
        localPosts = try repository.getAll()
        print(localPosts)
    } catch {
        print(error.localizedDescription)
    }
}
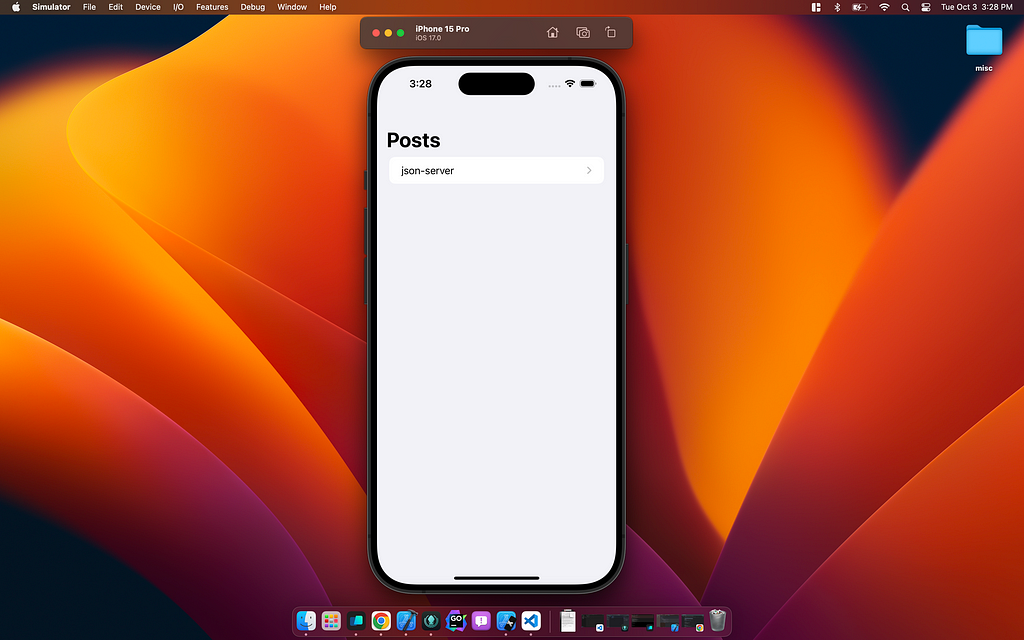
Awesome! Now run the app, and you should see some posts in the console and the UI. Stop the app and restart it.
You should now see two posts with the same title: “Post 1.”
This happened because we’re not specifying a unique identifier (or primary key) for our posts. Let’s fix that now. In the PostModel.swift file, update the id property to the following:
@Attribute(.unique)
var id: Int
Now, in the simulator, delete the app. Then, run it, close it, and rerun it.
You should now see only one post titled “Post 1.”
Let’s verify this works by adding a new post to our remote data source. In the db.json file, add a new post:
{
  "posts": [
    {
      "id": 1,
      "title": "Post 1",
      "author": "Johnny Appleseed"
    },
    {
      "id": 2,
      "title": "Post 2",
      "author": "Johnny Appleseed"
    }
  ]
}
Now run the app, and you should see two posts in the console and in the UI :party_parrot.
Update Local Data With Remote Data
Now that our local data store is syncing with our remote data source, let’s update the PostRepository to update existing posts. To do this, we’ll create a function called `updateLocalPosts` that will compare the remote posts with the local posts.
We’ll also need to make our Post model conform to the Equatable protocol to compare posts.
// PostModel.swift

@Model
class Post: Codable, Equatable {
    // other stuff...
}
Now, in the PostRepository.swift file, add the following method:
func updateLocalPosts(with remotePosts: [Post], in localPosts: inout [Post]) {
    for (index, localPost) in localPosts.enumerated() {
        if let matchingRemotePost = remotePosts.first(where: { $0.id == localPost.id }),
           localPost != matchingRemotePost
        {
            localPosts[index] = matchingRemotePost
        }
    }
}
Then, let’s call it in the sync method and remove the verifying print statement. We’ll also want to call updateLocalPosts before we create any new posts.
func sync(_ remotePosts: [Post]) throws -> [Post] {
    do {
        var localPosts = try repository.getAll()
        updateLocalPosts(with: remotePosts, in: &localPosts)
        repository.create(remotePosts)

        try repository.save()
    } catch {
        print(error.localizedDescription)
    }
}
Now, let’s verify this is working as expected. In the db.json file, update the title of the first post to “Post 1 Updated.” Then, run the app.
You should see the new title in the UI.
So. cool.
Delete Local Data
We want to ensure that if a post is no longer returned from the server, it is considered stale and should be removed from the local data store.
In ModelReposity.swift, add the following deleteEntities method:
func deleteEntities(_ models: [Model]) {
    for model in models {
        context.delete(model)
    }
}
And now, in PostReposity.swift, let’s use the previous method by adding it to this new method:
private func checkPostsForDeletion(localPosts: [Post], remotePosts: [Post]) -> [Post] {
    var postsToDelete: [Post] = []

    let remotePostIds = Set(remotePosts.map { $0.id })

    for localPost in localPosts {
        if !remotePostIds.contains(localPost.id) {
            postsToDelete.append(localPost)
        }
    }

    return postsToDelete
}
And call it in the sync method before updateLocalPosts and create.
The sync function should look like this:
// load local posts
var localPosts = try repository.getAll()

// first delete stale posts
let postsToDelete = checkPostsForDeletion(localPosts: localPosts, remotePosts: remotePosts)
repository.deleteEntities(postsToDelete)
updateLocalPosts(with: remotePosts, in: &localPosts)
repository.create(remotePosts)
try repository.save()
User Experience
Let’s make a few more edits to implement some easy UX wins. Again, to reiterate, this is a prototype and far from perfect.
First, let’s make an enum called RequestStatus to help us communicate to the end user what is happening under the hood.
// Types.swift
enum RequestStatus {
    case idle, loading, success, error
}
Now, back in ContentView.swift, let’s add a @State property to keep track of the request status and update the .task. Here’s what the code looks like:
@State private var requestStatus: RequestStatus = .idle

// and the modifier

.task {
    do {
        requestStatus = .loading

        let postRepository = PostRepository(context: modelContext)
        let remotePosts = try await PostService.getPosts()
        await postRepository.sync(remotePosts)

        requestStatus = .success
    } catch {
        print(error.localizedDescription)
        requestStatus = .error
    }
}
Now, let’s add views to the List that will display the request status. Your file should look like this:
List {
    switch requestStatus {
    case .loading:
        ProgressView()
    case .error:
        Text("error")
    default:
        ForEach(items) { item in
            NavigationLink {
                Text(item.title)
            } label: {
                Text(item.title)
            }
        }
    }
}
To simulate long-running requests, we can add a delay to the PostService’s getPosts method:
try await Task.sleep(nanoseconds: 3_000_000_000)
Now, run the app. You should see the three-second progress view before the posts are displayed.
Offline Support
Now that our local data store is syncing with our remote data source, let’s add some offline support. We want to fetch posts if the device is connected to the internet. Otherwise, we want to display the posts from the local data store.
Let’s create a new file called NetworkMonitor.swift, and add the following:
import Network
import SwiftUI

class NetworkMonitor: ObservableObject {
    private var monitor: NWPathMonitor
    private var queue: DispatchQueue

    @Published var isConnected: Bool = true

    init() {
        monitor = NWPathMonitor()
        queue = DispatchQueue(label: "NetworkMonitor")

        monitor.pathUpdateHandler = { [weak self] path in
            if path.status == .satisfied {
                DispatchQueue.main.async {
                    self?.isConnected = true
                }
            } else {
                DispatchQueue.main.async {
                    self?.isConnected = false
                }
            }
        }

        monitor.start(queue: queue)
    }
}
Now, let’s add a @StateObject property to the app entry SwiftDataExplorationApp:
@StateObject var networkMonitor = NetworkMonitor()

// and inject the value

ContentView()
    .environmentObject(networkMonitor)
Now, back in the ContentView.swift file, let’s add a @EnvironmentObject property to the ContentView and add a check to the .task modifier:
@EnvironmentObject private var network: NetworkMonitor

// and

.task {
     do {
        guard network.isConnected else { return }

        requestStatus = .loading

        let postRepository = PostRepository(context: modelContext)

        let remotePosts = try await PostService.getPosts()
        await postRepository.sync(remotePosts)

        requestStatus = .success
    } catch {
        print(error.localizedDescription)
        requestStatus = .error
    }
}
Disconnect from the internet and run the app to test whether this works. The locally stored posts should be displayed immediately.
Well, that’s all folks!
We now have a simple offline-first app. Add, edit, and remove items from db.json to check out all the neat stuff we made.
Again, this is far from perfect, but it does serve as an OK starting point/thought starter.
I’m looking forward to trying out more complex functionality with SwiftData.
If you have any questions or feedback, please feel free to comment.
Cheers!
Decodable SwiftData was originally published in Better Programming on Medium, where people are continuing the conversation by highlighting and responding to this story.