How to make an interactive lyric scrolling view in SwiftUI using ScrollProxy

It was a revelation to many, myself included, when it became clear that Taylor Swift wasn’t singing ‘all the lonely Starbucks lovers’ in her song Blank Space. Being able to see the lyrics of the song you’re listening to, displayed in time with the song, enables us to be more engaged with a song’s messages and better appreciate the artist’s lyrical talents (or lack of lyrical talents).
Spotify’s iOS app provides a card on the now-playing view that shows the lyrics of the song, usually synced to the music. Tapping on the card expands this into a simple, full-screen view that shows the lyrics, automatically scrolling to the current lyrics. It’s interactive, so if you tap on a lyric, the song will skip to that lyric.
Here is my attempt to create this UI in SwiftUI….
Creating the LyricDriver class
First, we need to create a controller to drive our view. We will create a class called LyricDriver, and make it conform to ObservableObject, enabling our views to ‘observe’ it and listen out for changes for properties with the @Published wrapper. We want to initialise this class with a simple data structure (TrackInfo)to represent a track, complete with lyrics broken up by line breaks, and an array representing the synced time for each section of the lyrics. Our class will translate the lyric data from this TrackInfo into an array of LyricLine objects, each with an associated time.
We need a timer to represent the time elapsed through the song. We can initialise a timer empty Timer object as a property. We then create a separate function to reinitialise the timer as a repeating timer with a 1 duration, which calls our ‘selector’ function every time it fires (i.e. every 1 second).
The method passed to #selector must be prefixed with @objc as the use of the selector pattern is an Objective-C framework. This method, fireTimer(), simply increments our time property by 1. As a result, the value of this property will be a count of the number of seconds elapsed since the timer began. For our purposes, we can avoid having to invalidate and recreate the timer by adding a condition to this method to only update time when the isPaused property is false.
// LyricDriver.swift

import Foundation
import SwiftUI

struct TrackInfo {

    var title : String
    var artist : String
    var length : Int

    var lyrics : String
    var times : [Int]
}

struct LyricLine : Identifiable{


    let id = UUID()
    let seq : Int
    let text : String
    let keyTime : Int

}

class LyricDriver : ObservableObject{

    @Published var lyricLines = [LyricLine]()
    @Published var time = 0
    @Published var isPaused = false

    var themeColor = Color.init(uiColor: UIColor(red: 46.0/255, green: 81.0/255, blue: 140.0/255, alpha: 1.0))

    var timer = Timer()

    let trackInfo : TrackInfo

    init(track: TrackInfo){

        self.trackInfo = track
        self.convertToLyricLine()

    }

    @objc private func fireTimer(){

        // Called each time the 1-second Timer fires (so each second) - progress time if song isn't finsihed or paused

        if !isPaused && time <= self.trackInfo.length{
            time += 1
        }

    }

    func pause_unpause(){
        isPaused.toggle()
    }

    func startTimer(){
        timer = Timer.scheduledTimer(timeInterval: 1.0, target: self, selector: #selector(fireTimer), userInfo: nil, repeats: true)
    }

    private func convertToLyricLine(){

        let parts = self.trackInfo.lyrics.split(separator: "n")

        var seq = 0
        for line in parts{

            self.lyricLines.append(LyricLine(seq: seq, text: String(line), keyTime: trackInfo.times[seq]))

            seq += 1
        }

    }
}
Creating the LyricsView
We will show the lyrics in aVStack within a vertical ScrollView. This VStack is populated by using ForEach, taking the lyricDriver’s LyricLine array as an argument.
One of the key features of the lyric view is that the lyrics should scroll in time with the music (in our case, the time property). To do this we need to programmatically scroll to subviews within our ScrollView. In SwiftUI, we can use ScrollViewReader to achieve this. All we need to do is place our ScrollView in the ScrollViewReader closure, which requires a ScrollViewProxy instance (here called ‘proxy’) as an argument. To enable us to scroll to specific lyric lines, we need to ensure each one has the .tag view modifier, and we can tag each lyric line with its time property.
Using the .onChange modifier, each time a change in the time property is observed (i.e. every second), we can instruct the proxy to scroll to the lyric line that has the tag matching the new time, if there is one. Setting the anchor to the .center will mean that as it scrolls, the line that is scrolled to will be in the centre of the ScrollView. Putting this inside withAnimation creates a nice smooth scrolling effect.
We can also tap on a lyric to scroll to it, by simply updating the time value to the time associated with a lyric line we tap on in the .onTapGesture modifier.
//LyricsView.swift

import SwiftUI

var test_lyrics  = "This is my attemptnAttemptnAttempt...nTo make an interactive lyric viewnJust like...nYou see on the Spotify appnI thought it was an interesting challenge to try and recreate something similar in SwiftUInWith ScrollProxies and Publsihed propertiesnWith GeomertyReaders and ZStacksnWe can create something that looks quite coolnYou can tap on the lyrics to skip the song, or use the scrubbernWe can hit playnWe can hit pausenIf you use this example view whilst listening to a song with lyricsnIt will confuse your mindnBecause your brain will try to match the lyrics you hear to this nonsese scrolling by!"

var test_times  =  [0,1,2,4,6,8,10,13,15,18,20,22,24,26,29,32]

struct LyricsView: View {

    @ObservedObject var driver = LyricDriver(track: TrackInfo(title: "Lyrics That Flow", artist: "The SwiftUI Band", length: 45, lyrics: test_lyrics, times: test_times))

    var body: some View {

        VStack(spacing: 0){

            HStack{
                Spacer()
                VStack{
                    Text(driver.trackInfo.title)
                        .bold()
                    Text(driver.trackInfo.artist)
                        .foregroundColor(.gray)
                        .font(.caption)
                }

                Spacer()

            }.padding(.top, 6)
                .background(driver.themeColor)

            ScrollViewReader{ proxy in


                ScrollView(.vertical, showsIndicators: false){
                    VStack {

                        Text("nnnn")

                        ForEach(driver.lyricLines, id: .keyTime){ line in


                            HStack{
                                Text(line.text)

                                    .font(.title)
                                    .bold()
                                    .opacity(driver.time >= line.keyTime ? 1 : 0.5)


                                Spacer()

                            }.padding(.vertical, 4)
                                .tag(line.keyTime)
                                .onTapGesture {

                                    // By updating the time property on tap gesture, we can tap on a lyric line to scroll to it

                                    driver.time = line.keyTime

                                }

                        }

                        // This just helps create an empty space below the lyrics so the last lyric line appears nearer middle of scren whens scrolled to.

                        Text("nnnnnnnnnn")
                    }

                    .onAppear{

                        driver.startTimer()

                    }
                }
                .animation(.linear, value: driver.time)

                .onChange(of: driver.time){

                    print(driver.time)

                    withAnimation{
                        proxy.scrollTo(driver.time, anchor: .center)
                    }

                }
            }
            .padding()
            .zIndex(1)
            .mask(LinearGradient(gradient: Gradient(colors: [driver.themeColor, driver.themeColor, driver.themeColor, .clear]), startPoint: .bottom, endPoint: .top))

            MusicControl(driver: self.driver)
        }
        .background(driver.themeColor)

    }
}
The MusicControl view — Play/Pause and Scrubber Bar
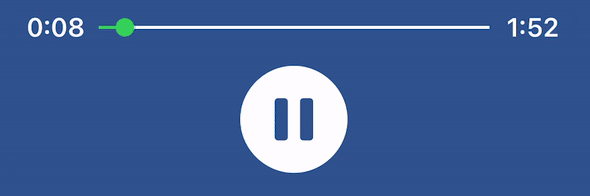
To create the music progress bar/scrubber and the play/pause bottom, we create a new view called MusicControl. This view will take an instance of our LyricDriver class as an argument and use it to initialise it as an ObservedObject. This will enable us to interact with the ‘playback’.
The play/pause button is a simple image using play/pause SF Symbols conditional on the LyricDriver instance property isPaused. When we tap it, we call the pause_unpause() method. In this example, we don’t actually invalidate the Timer but simply stop adding 1 to the time property when isPaused = true. This has the same effect as ‘pausing’ the music.
The scrubber is more complex. The progress bar is simply two very thin rectangle views in a ZStack. These are both initialised as the same size (both inherit their available width from the HStack the ZStack is embedded in), but the rectangle on top of the stack will show the progress, and we simply use .scaleEffect() to scale the width of the rectangle by a multiplier (the computed property progress_scaler) that represents the proportion of the song that has elapsed (i.e the time property divided by the trackInfo’s length property).
The challenge comes when we want to use the scrubber to skip to different parts of the ‘song’. To do this, it is easiest to know the actual maximum size of the progress bar. Getting absolute sizes of a view in Swift is a job for GeometryReader, and a quick trick if we want to find the size of an available space (in this case, the horizontal space in the ZStack) is to add an empty HStack within a GeometryReader. We add a small circle to the ZStack, and attach a .gesture() modifier to it. We will use a DragGesture to detect the user scrubbing through the song. In the onChanged modifier of the DragGesture, we are calculating the ‘delta’ between each detected change, and add this to the progress_x_pos value (a computed value that uses the max width of the progress bar from our GeometryReader and the progress_scaler) to find the new width of the progress bar (newSize). By dividing newSize by the total width, we can get how much the progress bar has progressed as a proportion of the total bar, and can use this proportion combined with the track length to calculate what the new time value should be as a result of the scrubbing (this probably would not be accurate enough for an actual music player!)
Because the time property is observed throughout our views, when we change it here we’ll see the lyrics scroll to the relevant line when we update the time value in the scrubber.
// MusicContro.swift


import SwiftUI

struct MusicControl: View {

    @ObservedObject var driver : LyricDriver
    @State var progess_size : CGSize = .zero
    @State var lastTranslation : CGSize = .zero

    var progress_x_pos : CGFloat{

        // Calculates the width of the elapsed time bar using the scaler and the max width of the progress bar from the geometry reader

        progess_size.width * progress_scaler

    }

    init(driver: LyricDriver){
        self.driver = driver
    }

    // Proportion of the 'song' that has elapsed....

    var progress_scaler : Double{ Double(driver.time) / Double(driver.trackInfo.length) }

    // Properties/functions to help display the track timings...

    func timeDisplayFormat(time: Int) -> String{

        var mins : Int = 0
        var secs : Int = 0

        if time >= 60{

            mins = time / 60
            secs = time % 60

        } else{
            mins = 0
            secs = time
        }

        return String(mins) + ":" + secs.twoDigStr
    }

    var timeleftDisplay : String{

        self.timeDisplayFormat(time: driver.trackInfo.length - driver.time)

    }

    var timeDisplay : String{

        self.timeDisplayFormat(time: self.driver.time)

    }

    var body: some View {

        VStack{
            HStack{
                Text(timeDisplay)
                    .frame(width: 40)
                    .bold()

                ZStack{

                    // This is the background scrubber background bar...
                    Rectangle()
                        .frame(height: 2)
                    GeometryReader { proxy in

                        HStack {}
                        // This empty HStack will be the same width as the scrubber bar
                            .onAppear {
                                self.progess_size = proxy.size

                            }
                    }

                    //This is the progress bar to show the time elapsed against the total time

                    Rectangle()
                        .frame(height: 2)
                        .scaleEffect(x: self.progress_scaler, anchor: .leading)
                        .foregroundColor(.green)
                        .animation(.default, value: progress_scaler)

                    // This Circle is at the end of the progress bar and will detect drag gestures for scrubbing

                    Circle()
                        .frame(width: 12, height: 12)
                        .foregroundColor(.green)
                        .position(CGPoint(x: self.progress_x_pos, y: self.progess_size.height/2 ))
                        .animation(.default, value: self.progress_x_pos)
                        .gesture(
                            DragGesture()
                                .onChanged({

                                    let delta = $0.translation.width - self.lastTranslation.width
                                    var newSize = self.progress_x_pos + delta
                                    driver.time = Int((newSize/self.progess_size.width) * Double(driver.trackInfo.length))
                                    self.lastTranslation = $0.translation

                                })
                                .onEnded{_ in
                                    self.lastTranslation = .zero
                                }
                        )
                }

                Text(timeleftDisplay)
                    .frame(width: 40)
                    .bold()

            }
            .padding(.horizontal, 20)

            HStack{
                Spacer()
                Image(systemName: driver.isPaused ? "play.circle.fill" :  "pause.circle.fill")
                    .font(.system(size: 70))
                    .onTapGesture {
                        driver.pause_unpause()
                    }
                Spacer()
            }
        }
            .frame(height: 100)
           .background(
                Rectangle()
                    .foregroundColor(driver.themeColor)
                    .blur(radius: 5)
            )
    }
}

extension Int{

    // Returns string version of Int with prefix of '0' if under 10

    var twoDigStr : String{
        let intStr = String(self)
        if intStr.count == 1{
            return "0" + intStr
        } else {
            return intStr
        }
    }
This is all we need to create an interactive lyric scrolling view in SwiftUI. Using the same colour across our view and various masks and blurs allows us to achieve the look. Worth noting this code is aimed at showing how we can leverage SwiftUI’s features such as ObservableObject and ScrollProxy to easily achieve this UI look and feel — there’d be many other refinements and changes to make to this view sit on top of an actual media player!
Create a Spotify-Style Lyric View in SwiftUI was originally published in Better Programming on Medium, where people are continuing the conversation by highlighting and responding to this story.