Exploring CoreData — From Data Model Creation to Managed Object Instances
The Core Data technology stack that makes SwiftData so excellent

For every developer who uses Core Data, building a data model using Xcode’s Core Data Model Editor, creating a container, loading a data model, and ultimately creating managed object instances through a managed object context are common operations.
But have you ever wondered about the internal mechanisms behind all of this? How does Core Data assist us in completing these tasks behind the scenes? This article will delve into the inner workings of Core Data in constructing managed object instances from a data model.
By the end of this article, you will have a deeper understanding of Core Data’s workflow, allowing you to be more proficient in your development endeavors.
Preface
Recently, I wrote an article about concurrent programming in SwiftData. The original plan was to discuss how SwiftData creates PersistentModel instances based on model declarations in the first part. I initially intended to explain it in a few paragraphs, but while writing, I realized it couldn’t be easily expressed and needed to be a separate piece.
As I started writing this article, I also realized that another article is needed to explain the implementation process of the Core Data version specifically. Thus, this article was born by chance.
This article will not delve into every detail of building data models to creating managed object instances. We will primarily focus on two aspects: how Core Data converts a model file into a ManagedObjectModel, and how it extracts information from it to create managed object instances.
This text will discuss the data model file provided by the Core Data project template created in Xcode.
Building Core Data Data Model File with Xcode Model Editor
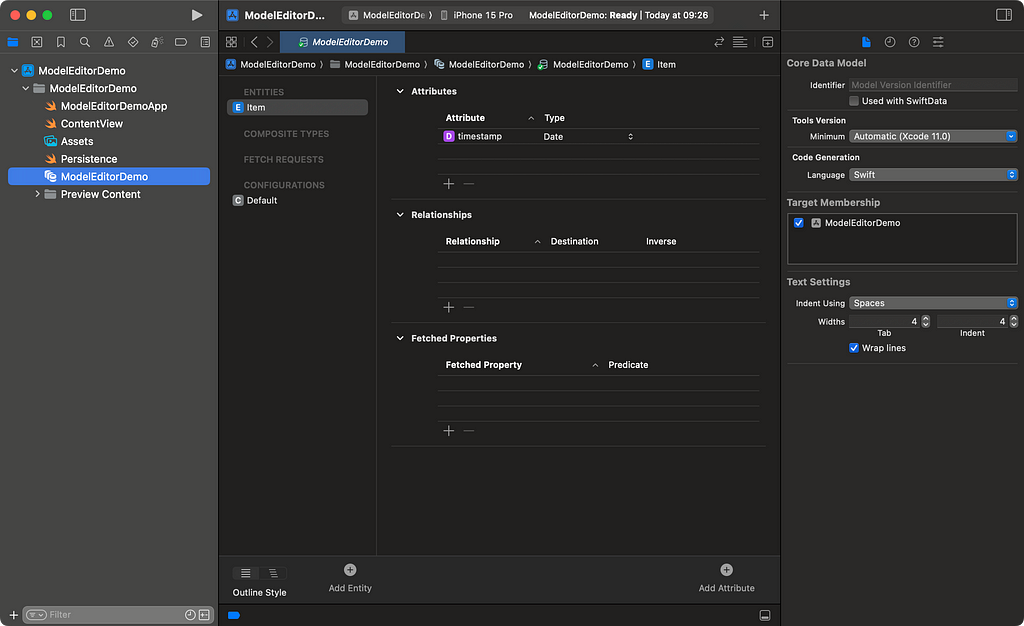
The model editor in Xcode provides us with a visual interface to define the data model of a Core Data application, including entities, properties, and other information. Using the model editor allows us to construct the data model more intuitively.
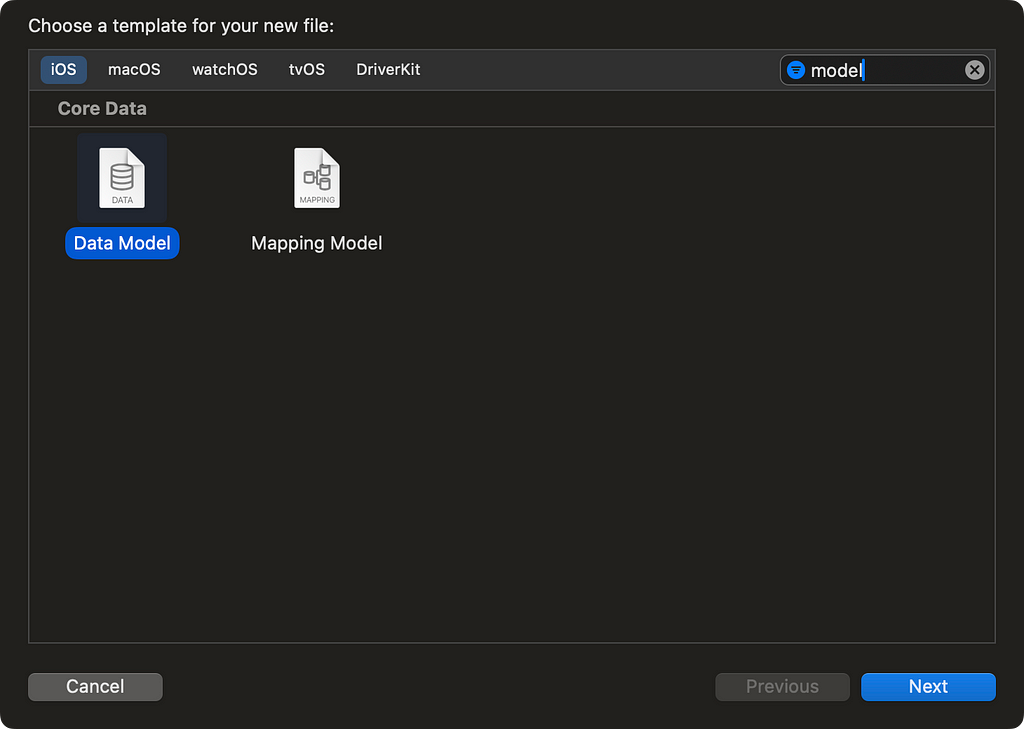
When creating a new project with Core Data included, Xcode will automatically create a data model file called ProjectName.xcdatamodeld in the project. Alternatively, we can manually create a Core Data data model file in the project with a file extension of .xcdatamodeld.


Xcode stores all the information created by the developer in the model editor in xcdatamodeld.
Specifically, xcdatamodeld is a directory called a “Core Data Model Bundle.” It is a special bundle used to store and manage the data model information for Core Data. It contains one or more data model files (.xcdatamodel) as well as other information related to the data model. Xcode creates a separate VersionName.xcdatamodel bundle for each model version within the xcdatamodeld directory.
Now, open the content file in the xcdatamodel with a text editor, and you will see that all the model information of the current version is saved in XML format.
<?xml version="1.0" encoding="UTF-8" standalone="yes"?>
<model type="com.apple.IDECoreDataModeler.DataModel" documentVersion="1.0" lastSavedToolsVersion="1" systemVersion="11A491" minimumToolsVersion="Automatic" sourceLanguage="Swift" usedWithCloudKit="false" userDefinedModelVersionIdentifier="">
    <entity name="Item" representedClassName="Item" syncable="YES" codeGenerationType="class">
        <attribute name="timestamp" optional="YES" attributeType="Date" usesScalarValueType="NO"/>
    </entity>
    <elements>
        <element name="Item" positionX="-63" positionY="-18" width="128" height="44"/>
    </elements>
</model>
In this case, each entity element corresponds to an Entity, which contains entity name, corresponding subclass name, attributes, relationships, custom indices, and more. We can find the corresponding information in the XML file if we create a new Configuration or Fetch Request in the model editor.
In Xcode 14, the visual relationship view has been removed. This relationship view played an essential role in the model editor, allowing for a visual representation of the relationships between entities. The information in the elements element has become ineffective by removing the visual relationship view.
Xcode, when compiling a project, will include the .xcdatamodel directory as a momd bundle in the application’s resources. The .xcdatamodel bundle will be compiled into a binary file with the mom extension. This reduces the space occupied and improves loading speed. This is also why we need to set the extension to momd when loading the model file using code.
Developers should understand that the model file created through Xcode’s model editor is just a structured representation of the model, not a programmatic representation.
Generate the Declaration of NSManagedObject Subclass Corresponding to the Entity
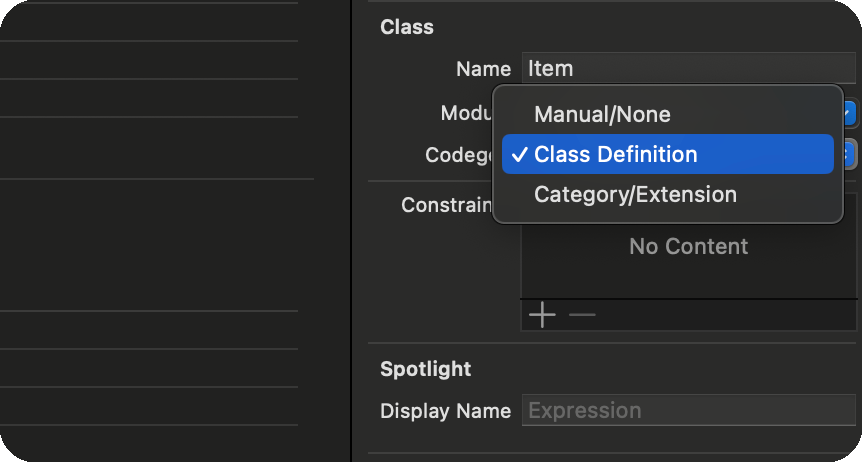
In most cases, developers will declare a corresponding NSManagedObject subclass for the Entity. When Codegen is set to Class Definition or Category/Extension, Xcode will implicitly assist us in completing this task.

When Codegen is set to Class Definition, Xcode will generate a separate NSManagedObject subclass that includes the definition of entity properties and methods. For example:
@objc(Item)
public class Item: NSManagedObject {}

extension Item {
    @nonobjc public class func fetchRequest() -> NSFetchRequest<Item> {
        return NSFetchRequest<Item>(entityName: "Item")
    }
    @NSManaged public var timestamp: Date?
}
extension Item : Identifiable {}
When Codegen is set to Category/Extension, Xcode will generate an extension that adds entity properties and methods to the default implementation of NSManagedObject. This helps avoid modifying the automatically generated code and maintains the maintainability of the code.
@NSManaged is an attribute modifier used to mark a property that is managed by Core Data. It informs the compiler that this property will have its relevant access methods automatically generated by Core Data and will be dynamically associated with the property on the managed object at runtime.
Developers can also manually create these codes or use Xcode to generate them explicitly. Manually creating codes can express the attribute types more accurately and provide higher flexibility. Using Xcode to generate codes can save the workload of manual coding, especially when there are many attributes or complex model structures.
Regardless of the chosen method, generating a subclass declaration that conforms to NSManagedObject allows developers to safely and conveniently access the managed properties of the managed object. By overriding certain methods of the subclass (e.g., willSave), certain operations can be tailored to specific entities.
extension Item {
    public override func willSave() {
        super.willSave()
        // do something
    }
}
Although it is possible to gain the aforementioned benefits, creating a corresponding subclass of NSManagedObject is unnecessary for entity declaration. Core Data also provides a lightweight way to access and manipulate managed objects using the NSManagedObject itself for property access and manipulation.
// item:Item
let timestamp = item.timestamp
// object is a NSManagedObject instance create by Item Entity description
let timestamp = object.value(forKey: "timestamp") // trigger KVO
let timestamp = object..primitiveValue(forKey: "timestamp") // not trigger KVO
In the example above, item.timestamp is achieved by declaring a corresponding subclass of NSManagedObject for the entity Item, called Item. On the other hand, object.value(forKey:) and object.primitiveValue(forKey:) are methods to access properties through the NSManagedObject object itself. It is important to note that the value(forKey:)method triggers Key-Value Observing (KVO), while the primitiveValue(forKey:) method does not trigger KVO.
To some extent, we can consider @NSManaged as a mechanism similar to Swift’s computed properties. Using the value(forKey:) and setValue(_:forKey:) methods, we can read and set the underlying value of a managed object. This allows us to perform custom logic operations on properties when needed, such as data format conversion, data validation, and so on.
Load Data Model, Create Container
Ever since Core Data introduced NSPersistentContainer, developers rarely need to explicitly read the data model file and create the data model in their code (NSManagedObjectModel) unless there are specific circumstances.
let container = NSPersistentContainer(name: "ModelEditorDemo")
However, understanding the work behind creating a container in Core Data is still very helpful for later understanding the process of creating managed object instances.
// Load the data model file and create NSManagedObjectModel
guard let url = Bundle.main.url(forResource: "ModelEditorDemo", withExtension: "momd"),
      let dataModel = NSManagedObjectModel(contentsOf: url) else {
     fatalError("Failed to load the data model file")
}

// Create the persistent store coordinator
let coordinator = NSPersistentStoreCoordinator(managedObjectModel: dataModel)
// Get the configuration from the data model
let configuration = dataModel.configurations.first!
// Create the URL for the persistent store
let storeURL = URL.applicationDirectory.appending(path: "store.sqlite")
// Create or load the persistent store with the specified configuration
guard let store = try? coordinator.addPersistentStore(type: .sqlite, configuration: configuration,at: storeURL,options: nil) else {
    fatalError("Failed to create persistent store: \(error)")
}
// Create a main queue NSMangedObjectContext
let viewContext = NSManagedObjectContext(.mainQueue)
// Link context to coordinator
viewContext.persistentStoreCoordinator = coordinator
The general process is as follows:
- Obtain the URL of the data model file (momd).
- Create an NSManagedObjectModel instance using the URL.
- Create an NSPersistentStoreCoordinator instance using the NSManagedObjectModel instance.
- Add a persistent store to the NSPersistentStoreCoordinator instance.
- Create a main thread-managed object context.
- Associate the context with the NSPersistentStoreCoordinator instance.
In this case, when using the data model file URL to create an NSManagedObjectModel instance, Core Data converts the descriptions in the model file into programmatic expressions for entities first. After that, it uses these programmatic expressions to create the NSManagedObjectModel instance. This conversion process allows us to create and manipulate data models programmatically, not just limited to using the visual editor.
Describe Entities Programmatically and Create Data Model Instances
In addition to using the data model editor for visual operations, Core Data provides a way to express entities and create data models programmatically.
The following code demonstrates the process of describing the Item entity and programmatically creating a data model.
func createModel() -> NSManagedObjectModel {
    let itemEntityDescription = NSEntityDescription()
    // Entity Name
    itemEntityDescription.name = "Item"
    // NSManagedObject SubClass Name
    itemEntityDescription.managedObjectClassName = "Item"
    // Descriptor timestamp attribute
    let timestampAttribute = NSAttributeDescription()
    // Attribute Name
    timestampAttribute.name = "timestamp"
    // Is Optional
    timestampAttribute.isOptional = true
    // Attribute Type
    if #available(macOS 12.0, iOS 15.0, tvOS 15.0, watchOS 8.0, *) {
        timestampAttribute.type = .date
    } else {
        timestampAttribute.attributeType = .dateAttributeType
    }
    // Add timestamp to Item
    itemEntityDescription.properties.append(timestampAttribute)
    // Create a empty NSManagedObject
    let model = NSManagedObjectModel()
    // Add Item Entity into model
    model.entities = [itemEntityDescription]
    return model
}
The above code corresponds almost one-to-one with the operations we do in the model editor. However, visual operations are more efficient and convenient when there are numerous properties or complex relationships.
Through visual operations, we can intuitively add, edit, and delete entities, properties, and relationships in the graphical interface without manually writing a large amount of code. This makes the creation and maintenance of data models easier and faster.
Now, we can use this code snippet to replace the previous operation of creating NSManagedObjectModel through a data model file.
// Create data model by programming way
let dataModel = createModel()

// Create persistent store coordinator by dataModel
let coordinator = NSPersistentStoreCoordinator(managedObjectModel: dataModel)
Even though visual editing is more efficient, programmatic expression provides developers with a broader space for describing data models, allowing custom description methods to be mapped to programmable expressions that Core Data can accept.
This flexibility enables developers to meet specific business needs better. Additionally, the programming approach can provide more type safety and compile-time checks, reducing the possibility of errors occurring at runtime.
Creating Managed Object Instances
Core Data is an object graph management framework that allows us to work with persistent data in an object-oriented manner. We build data models to define the structure of our data and perform operations on it using managed object instances.
There are two common ways to obtain managed object instances:
- By setting predicates and using NSFetchRequest, Core Data returns managed objects that match the specified conditions.
- By directly calling the constructor of the NSManagedObject subclass that corresponds to the entity, we can create managed object instances.
Developers often use the following approach to create managed object instances:
let item = Item(context: viewContext)
item.timestamp = .now
try? viewContext.save()
However, init(context:) requires us to create a managed object context (NSManagedObjectContext) first. In fact, in Core Data, we can completely create managed object instances without a context.
let item = Item(entity: Item.entity(), insertInto: nil)
item.timestamp = .now
viewContext.insert(item)
try? viewContext.save()
The init(entity:, insertInto:) constructor is the designated initializer of NSManagedObject, while init(context:) is its convenience initializer. The key to creating a managed object instance is not whether there is a managed object context but instead informing NSManagedObject which EntityDescription the instance corresponds to.
It is important to note that when we use Item.entity() to obtain the EntityDescription corresponding to Item, we need to ensure that NSPersistentStoreCoordinator has loaded the NSManagedObjectModel.
let coordinator = NSPersistentStoreCoordinator(managedObjectModel: dataModel)
In Core Data, after NSPersistentStoreCoordinator is created, the data model is saved in a location accessible to internal elements for retrieval. The Item.entity() method retrieves the EntityDescription corresponding to Item. If we did not use a data model containing Item when creating NSPersistentStoreCoordinator, or if we did not create NSPersistentStoreCoordinator at all, calling Item.entity() will result in Core Data throwing the following error:
CoreData: error: No NSEntityDescriptions in any model claim the NSManagedObject subclass 'Item' so +entity is confused. Have you loaded your NSManagedObjectModel yet ?
This does not mean we do not have other ways to bypass the limitations of NSPersistentStoreCoordinator.
guard let url = Bundle.main.url(forResource: "ModelEditorDemo", withExtension: "momd"),
      let dataModel = NSManagedObjectModel(contentsOf: url) else {
     fatalError("Failed to load the data model file")
}

let entityDescription = dataModel.entitiesByName["Item"]!
let item = Item(entity: entityDescription, insertInto: nil)
By directly obtaining the corresponding EntityDescription from NSManagedObjectModel, developers can have the ability to create managed object instances with only an instance of NSManagedObjectModel. This is particularly useful when only manipulating the data model without dealing with the managed object context is needed.
Read the article “How to preview a SwiftUI view with Core Data elements in Xcode” to see how this method is applied in SwiftUI previews.
As mentioned, developers do not necessarily have to create instances of managed object subclasses. Using the correct EntityDescription, we can create NSManagedObject instances that can achieve the same effect in many scenarios.
let item = NSManagedObject(entity: Item.entity(), insertInto: nil)
item.setValue(Date.now, forKey: "timestamp")
viewContext.insert(item)
try? viewContext.save()
Final Thoughts
This article discusses several methods for building data models and creating managed object instances in Core Data, some of which may not be common. Some readers may find these methods confusing, but even without understanding them, it will not affect our ability to proficiently use Core Data.
However, this article aims to introduce these uncommon methods to readers, as we will explore “How SwiftData creates PersistentModel instances based on model declarations” in the next articles. At that time, we will see how the SwiftData development team utilizes the content introduced in this article and Swift’s new features to build a persistent framework that aligns with the new era.
A Chinese version of this post is available here.
Want to Connect?

@fatbobman on Twitter.
Exploring CoreData — From Data Model Creation to Managed Object Instances was originally published in Better Programming on Medium, where people are continuing the conversation by highlighting and responding to this story.