Jest, Cypress, and Storybooks

Audience
This article is aimed at engineers with a solid understanding of React, Next.js, and Typescript. An excellent start would be my pieces linked in the previous sentence.
The goal is to move from writing well-constructed front-end code to writing well-constructed front-end code we know works (an important distinction).
To do this we will introduce:
- Jest: Generally used for unit tests. Provides a JavaScript testing framework with mocking and code coverage tools.
- Cypress: End-to-end and component testing framework. Tests behavior and visually feeds back with screenshots and videos where errors occur.
- Storybook: For UI development and testing. Lets you build components and pages in isolation, without worrying about the wider application.
Argument
To set the scene let’s explore the different types of testing.
Types of Testing
There are multiple different ways we can test software. Each has a different method (automated or manual), emphasis, and cost (generally measured in time and complexity).
I’ve indicated which technologies we’ll cover, if any, for each test type. I’ve also shown generally which types of test are automated. Obviously, you manually check your code as you go along, but we don’t need to point this out.
- Unit tests [Jest] (automated): These are low-level tests that sit close to the application code. Generally, they are concerned with testing individual methods and classes.
- Integration tests (automated): These are slightly higher level and ensure different parts of our application interact correctly. For example, a server and a database.
- Functional testing (automated): These confirm the business logic is correct. They are different from integration tests in that they don’t look at the internal state, they only verify behavior.
- End-to-end testing [Cypress] (automated): These replicate complex user flows across the whole application. They confirm that end users can interact with our program as expected. They are the most complex and costly.
- Acceptance testing [Storybook] (automated/ generally manual): This is where we check to make sure that what we’ve built satisfies our business requirements. This could include putting it in front of your product manager and making sure they’re happy.
- UI testing [Storybook] (automated): Ensures everything appears on screen and functions correctly. Concerned with things like ‘When I press this button, does it do what I expect?’.
- Smoke testing (automated/ manual): When we create a new version of an application we run these initial tests to make sure that nothing catches fire when we turn it on. They are a minimal suite of tests to confirm we’ve not broken anything.
- Canary testing: This reduces risk by initially releasing new versions to a small number of users, then expanding the group as we verify there are no issues.
- Performance testing: A brilliant article on the subject is here. Performance testing ensures the scalability, stability and reliability of your web services.
When mentioning testing it is also obligatory to cover the test pyramid. This dictates how many of each test you should use.
Introducing our Next.js Project
We will be using the Next.js project in the repository here. If you’re a little lost you can see how it was built using the article here, although if you’re familiar with Next that will be enough.
Jest for Unit Testing
Jest offers a number of useful, Next-friendly, tools to help make your life easier. My top ones are the ability to parallelize and optimize your test runs to make them quicker, as well as the built-in mocking.
To set up Jest in our Next project we can follow the instructions here. An added dependency is the imaginatively named ‘Testing Library’ which you can find more information about here and is used to test the UI.
We add a convenience script to our package.json to aid us in running our tests. The watch option allows us to rerun tests when the file is changed.
  "scripts": {
    ...
    "test": "jest --watch"
  },
Jest on its own is just a JavaScript testing framework. However, in combination with the libraries we installed in setup, we added some extra functionality for testing React with Next. Let’s write our first test.
We need a small, example page first.
import Head from 'next/head'
import styles from '@/styles/Home.module.css'

const Home = () => {
  return (
    <>
      <Head>
        <title>Jest Testing Page!</title>
      </Head>
      <main className={styles.main}>
        <h1>Here's our testing page!</h1>
      </main>
    </>
  )
}

export default Home
We can access this on http://localhost:3000/jest.
To write our test we create a file at __tests__/src/pages/jest/index.test.ts
import { render, screen } from '@testing-library/react';
import Home from '../../../../src/pages/jest/index';
import '@testing-library/jest-dom';

describe('Home', () => {
  it('Renders the heading', () => {
    render(<Home />);

    const heading = screen.getByRole('heading', {
      name: "Here's our testing page!",
    });

    expect(heading).toBeInTheDocument();
  });
});
Here we import the page we defined previously, as well as some other Jest requirements.
The purpose of describe is to group together related tests. In this context, we’ve used it to group everything for that page.
The it function is an alias for test and defines a single test we would like to run. So far all of this functionality has been from Jest, but we are going to require some of the Testing Library functions to complete the rest.
The render function is used to render the Home component we defined, where screen is a convenience object used to query what is rendered. We then retrieve our heading and expect (back to Jest) it to be in the document.
If you’re interested in a more in-depth view of things (and how the testing library functions interact with the document.body) you can read the linked documentation.
The other interesting thing about Jest is the ability to do snapshots. Snapshots allow you to detect unexpected changes to the UI.
Generally, they render a component, take an impression and compare it to one stored on file. Let’s look at a quick example.
import { render } from '@testing-library/react';
import Home from '../../../../src/pages/jest/index';

it('Home component snapshot test', () => {
  const { container } = render(<Home />);
  expect(container).toMatchSnapshot();
});
The majority of the above syntax should be familiar to you from the previous test. The only new part is destructuring into just the container. This returns the div containing your component.
If we make changes to the file we will be warned as below.

So we’ve covered our basic testing and snapshots, let’s finish up with mocking.
To demonstrate this in Next we’re going to have to get a little more involved. First of all, let’s write a new version of the Home component which requires us to execute a function.
import Head from 'next/head'
import styles from '@/styles/Home.module.css'
import titleProvider from './title-provider'

const Home = () => {

  const title = titleProvider()

  return (
    <>
      <Head>
        <title>Jest Testing Page!</title>
      </Head>
      <main className={styles.main}>
        <h1>{title}</h1>
      </main>
    </>
  )
}

export default Home
We now rely on a function from a separate file, titleProvider . We see the implementation below.
const titleProvider = () => "Here's the title!"

export default titleProvider
What we would like to do is write a test that mocks the title provider, giving an alternate value. We do this below.
import { render, screen } from '@testing-library/react';
import Home from '../../../../src/pages/jest/mocks';
import '@testing-library/jest-dom';
import titleProvider from '../../../../src/pages/jest/title-provider';

// Here we mock the dependency and provide a different implementation
// of the title provider function.
jest.mock('../../../../src/pages/jest/title-provider', () => ({
    // Flag to treat it as an ES module
    __esModule: true,
    // Here we override the default export with a mock function
    // providing a different value.
    default: jest.fn(() => 'Here is the mocked title!')
}))

// In order to refer to the mocked function we need to pull
// it from the import and cast it to the mocked type we expect
const mockTitleProvider = titleProvider as jest.MockedFn<() => string>

// This works the same as our previous testing
describe('Home', () => {
  it('Renders the heading', () => {
    render(<Home />);

    const heading = screen.getByRole('heading', {
      name: "Here is the mocked title!",
    });

    expect(heading).toBeInTheDocument();

    // As we have done the cast above we can now refer to
    // this mock and discover a bit more about how it was called.
    expect(mockTitleProvider.mock.calls).toHaveLength(1)
  });
});
I’ve added some comments to make things clearer, but to summarise:
- We used partial mocking to overwrite the default function.
- We then used a mock function to supply a different value.
- Finally, we utilized the mock property to find out how the mock was called and how our test works.
This concludes our whistle-stop tour of Jest, now we step back a little and look at end-to-end testing.
Cypress for End-to-End Testing
The next thing is Cypress, an open-source testing framework. We can use this to run tests imitating a user’s behavior, either at an application or component level. Let’s work through an example.
The first thing we need to do is install Cypress with the below command.
npm install cypress --save-dev
We can then open the Cypress app and start writing our first test!
npx cypress open
We’re welcomed with a screen similar to the below:
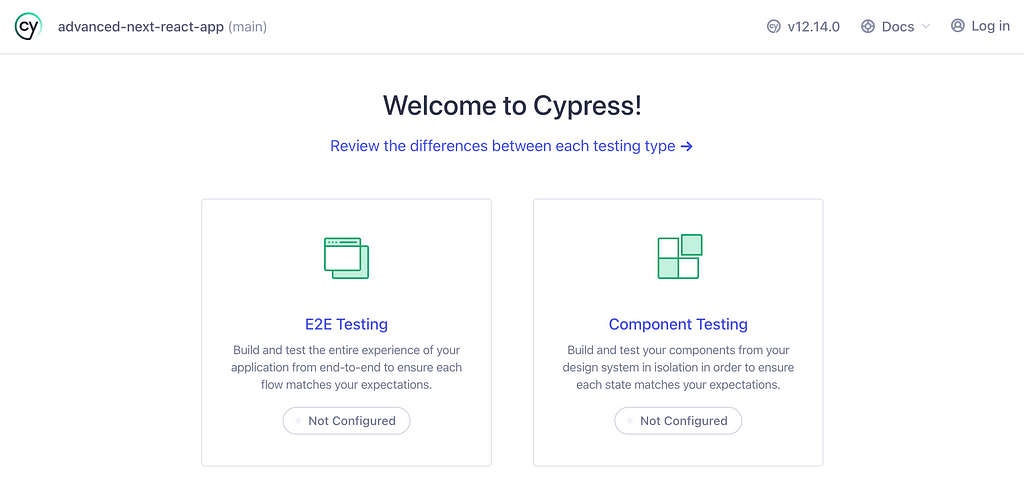
We click on the leftmost screen to begin configuring the framework. It then informs us of the various configuration files it installs and their purposes.
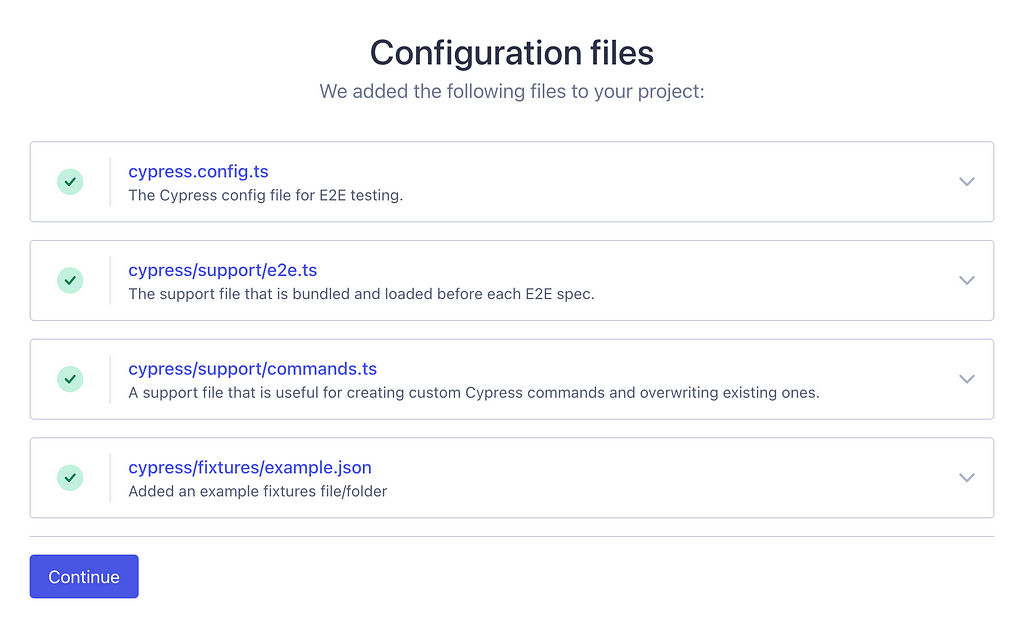
We choose a browser, and we’re off! In the selected browser you will see a screen like the below.

A test spec will help us define exactly what we’d like to test and how we’d like to test it.
Click ‘Create new spec’ and follow through the steps afterwards. A new file should be created at /cypress/e2e/spec.cy.ts with contents similar to the below.
describe('template spec', () => {
  it('passes', () => {
    cy.visit('https://example.cypress.io')
  })
})
This should look familiar from our previous section on Jest (although apparently, they come from Mocha, a different framework)! The only new component is cy.visit, which comes from the Cypress API.
The API can be broken down into four sections:
- Query: Reads the state of the application. For example, what’s displayed on the screen.
- Assertion: Asserts the state of the application matches some criteria. For example, something, in particular, is displayed on the screen.
- Action: Interacting with the application. For example, clicking a button.
- Other: Anything else (I agree this is a bit of a categorizing cop-out, but there you go).
Let’s write a small example screen to test. I won’t include the code, but if you need it it’s here.
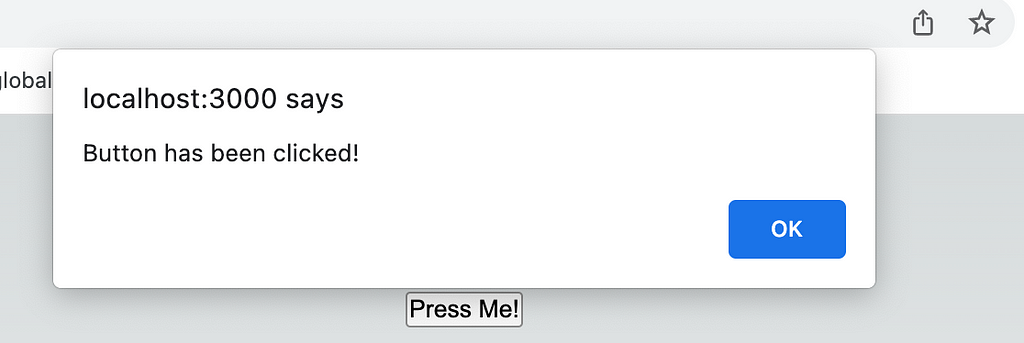
The screen contains a single button, which can be clicked to trigger an alert. Let’s write our test.
describe('Cypress Page', () => {
  it('Alert window opens', () => {

    // Arrange
    const stub = cy.stub()
    cy.on ('window:alert', stub)

    // Act
    cy.visit('http://localhost:3000/cypress')
    cy.get('[id="button-test-id"]').click().then(() => {

      // Assert
      expect(stub.getCall(0)).to.be.calledWith('Button has been clicked!')
    })
  })
})
We’ve split the test into three rough sections: arrange (get everything for our test), act (carry out the behavior we would like to test), and assert (make sure what we expected to happen, happened).
Cypress provides stubbing using the bundled Sinon library. We then use events and event listeners to provide the stub whenever an alert is triggered.
Next, we visit the URL and use a selector to click the element. Some useful best practices are here.
Finally, we do our assertions. Notice how we have a method chained .then to our click to make sure that we carry out the assertion once the click has happened.
Let’s run it from the command line using npx cypress run. The UI runner is great for getting familiar with the tool, but in reality, it’s easiest doing everything from the terminal. This is especially true as we will want to run our tests as part of our CI/ CD pipeline.
OK, this is a simple, passing test. However, from my view one of the strengths of Cypress is how easy it is to catch issues when tests fail. Let’s cause this by changing the text so it doesn’t match.
Cypress gives the obligatory error messages, but it also provides screenshots and videos showing you where in the UI it all went wrong.
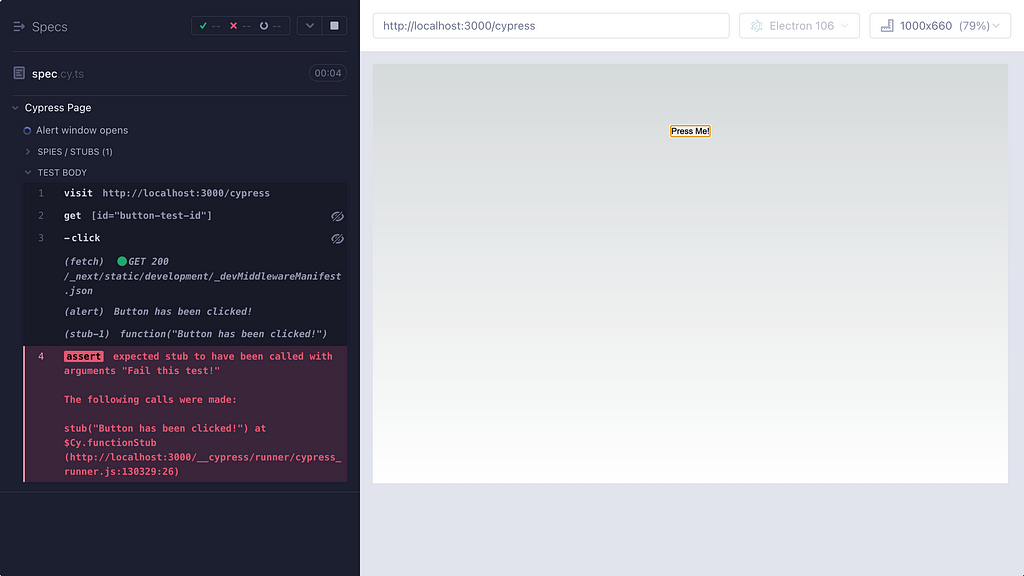
Let’s now introduce component testing, which requires a little manual setup on our part, or using the wizard from before. Component tests are intended for our React components, however if we want to cover our pages we should use end-to-end tests to cover server-side functionality.
We can use a minimal test to mount our component:
import React from 'react'
import Home from './index'

describe('<Home />', () => {
  it('renders', () => {
    cy.mount(<Home />)
  })
})
We can expand on this, but let’s save our component brainpower for the next section on Storybooks.
Storybooks for UI Testing
Web applications can quickly become large and complex. When we’re developing a new page we don’t want to boot up the whole app and have to navigate to the part we’re working on.
Additionally, if the bit we’re working on is hard to get to (perhaps an edge or error case), we don’t want to fiddle around recreating it every time.
Finally, the UI is a great place to get sign-off from the product team before you roll something out to production and add documentation.
All of these points are addressed by Storybook. This workshop allows you to develop and share your UI in chunks, without having to run the whole app.
We can add Storybook to our project with npx storybook@latest init. This will do things like detect the framework we’re using (Next) and set up some initial stories (covered shortly)
We can then open the console with npm run storybook and we’ll be welcomed by a splash screen similar to the below.
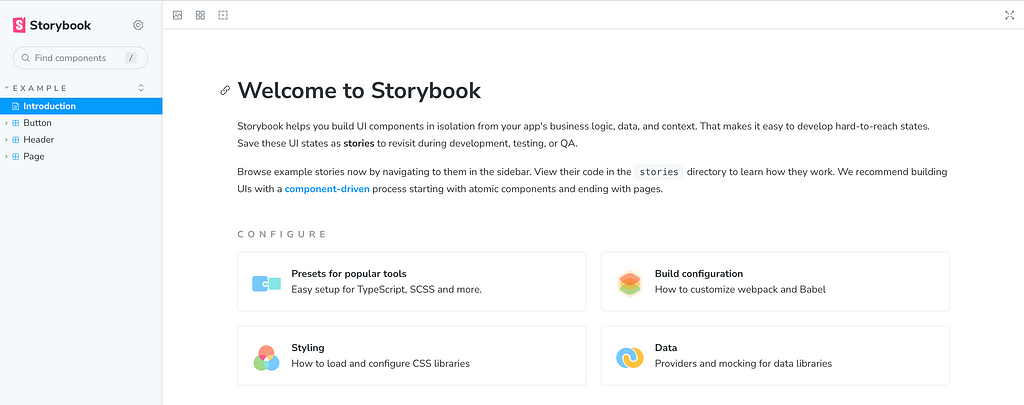
As the name suggests, Storybook is based on the concept of stories. These are designed to capture the different states your components can reach.
Let’s create a page for testing.
import Head from 'next/head'

interface Title {
    title: string
    onClick?: () => void;
}

const Home = (title: Title) => {

    return (
        <>
            <Head>
                <title>Storybook Testing Page!</title>
            </Head>
            <main>
                <h1>{title.title}</h1>
                <button onClick={title.onClick}>Click me!</button>
            </main>
        </>
    )
}

export async function getServerSideProps() {

    return {
      props: {
        title: "Here is some server side rendering!"
      }
    };

  }

export default Home
To briefly describe what we have above, we’re server-side rendering some information to display in a component. If we think about testing in isolation it would be painful to have to mock data from the server each time.
Let’s write something for Storybook telling it how to render the Home component.
import type { Meta, StoryObj } from '@storybook/react';

import Home from './index';

const meta: Meta<typeof Home> = {
  component: Home,
};

// This default export determines where your story goes in the UI list
export default meta;
type Story = StoryObj<typeof Home>;

// Here we tell Storybook about our component, and give it some information
// on how to render.
 export const Primary: Story = {
    args: {
      title: 'Hello world!',
    },
  };
And that’s sort of it! Now if we open Storybook we’ll have access to our component, and we can even edit the title.
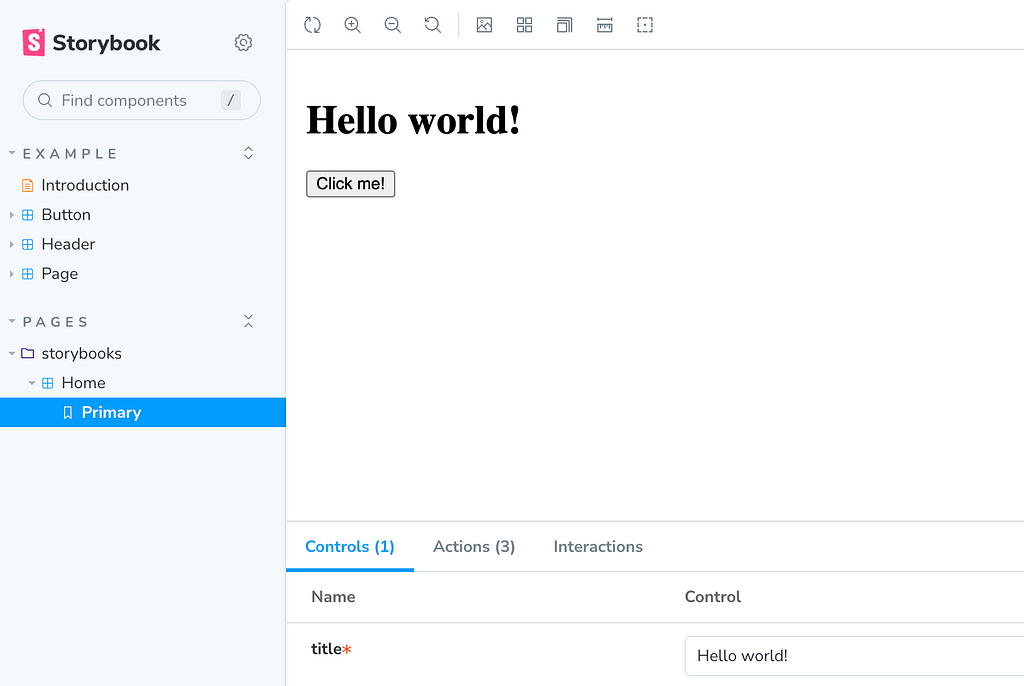
Conclusion
This is, of course, a very high-level view of all the tools. However, it should be enough for you to appreciate what they’re for, and roughly how to employ them in a project.
Hope you enjoyed it!
A Crash Course in Testing Next.js Projects was originally published in Better Programming on Medium, where people are continuing the conversation by highlighting and responding to this story.